PacMan Ghost Thermoforming

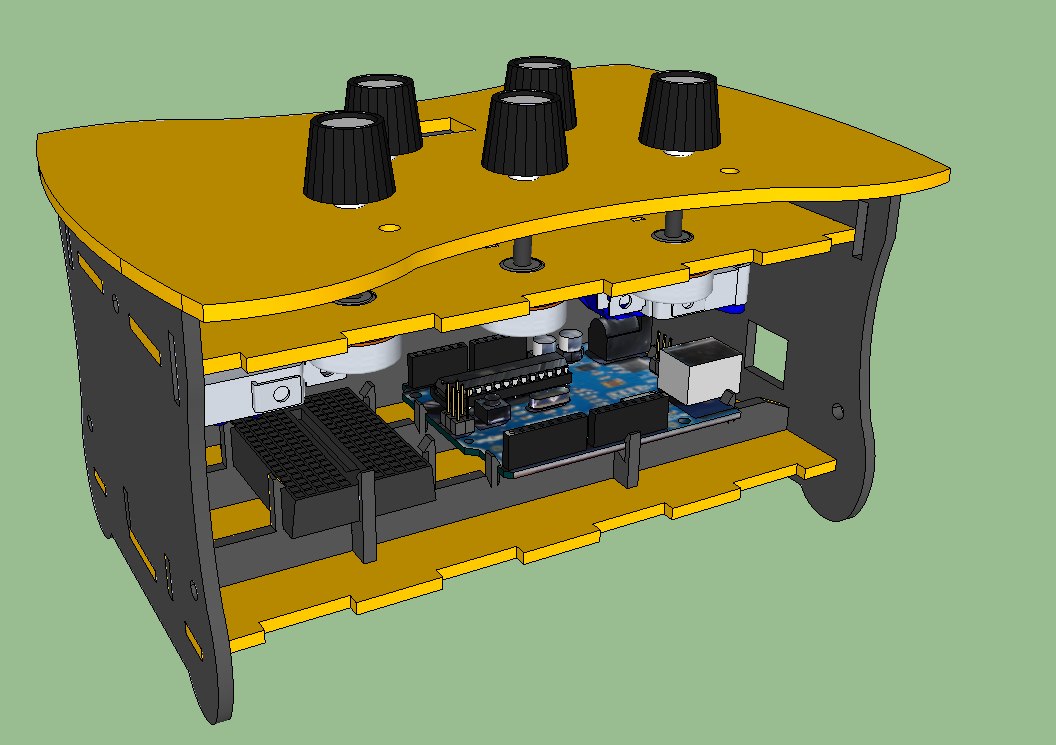
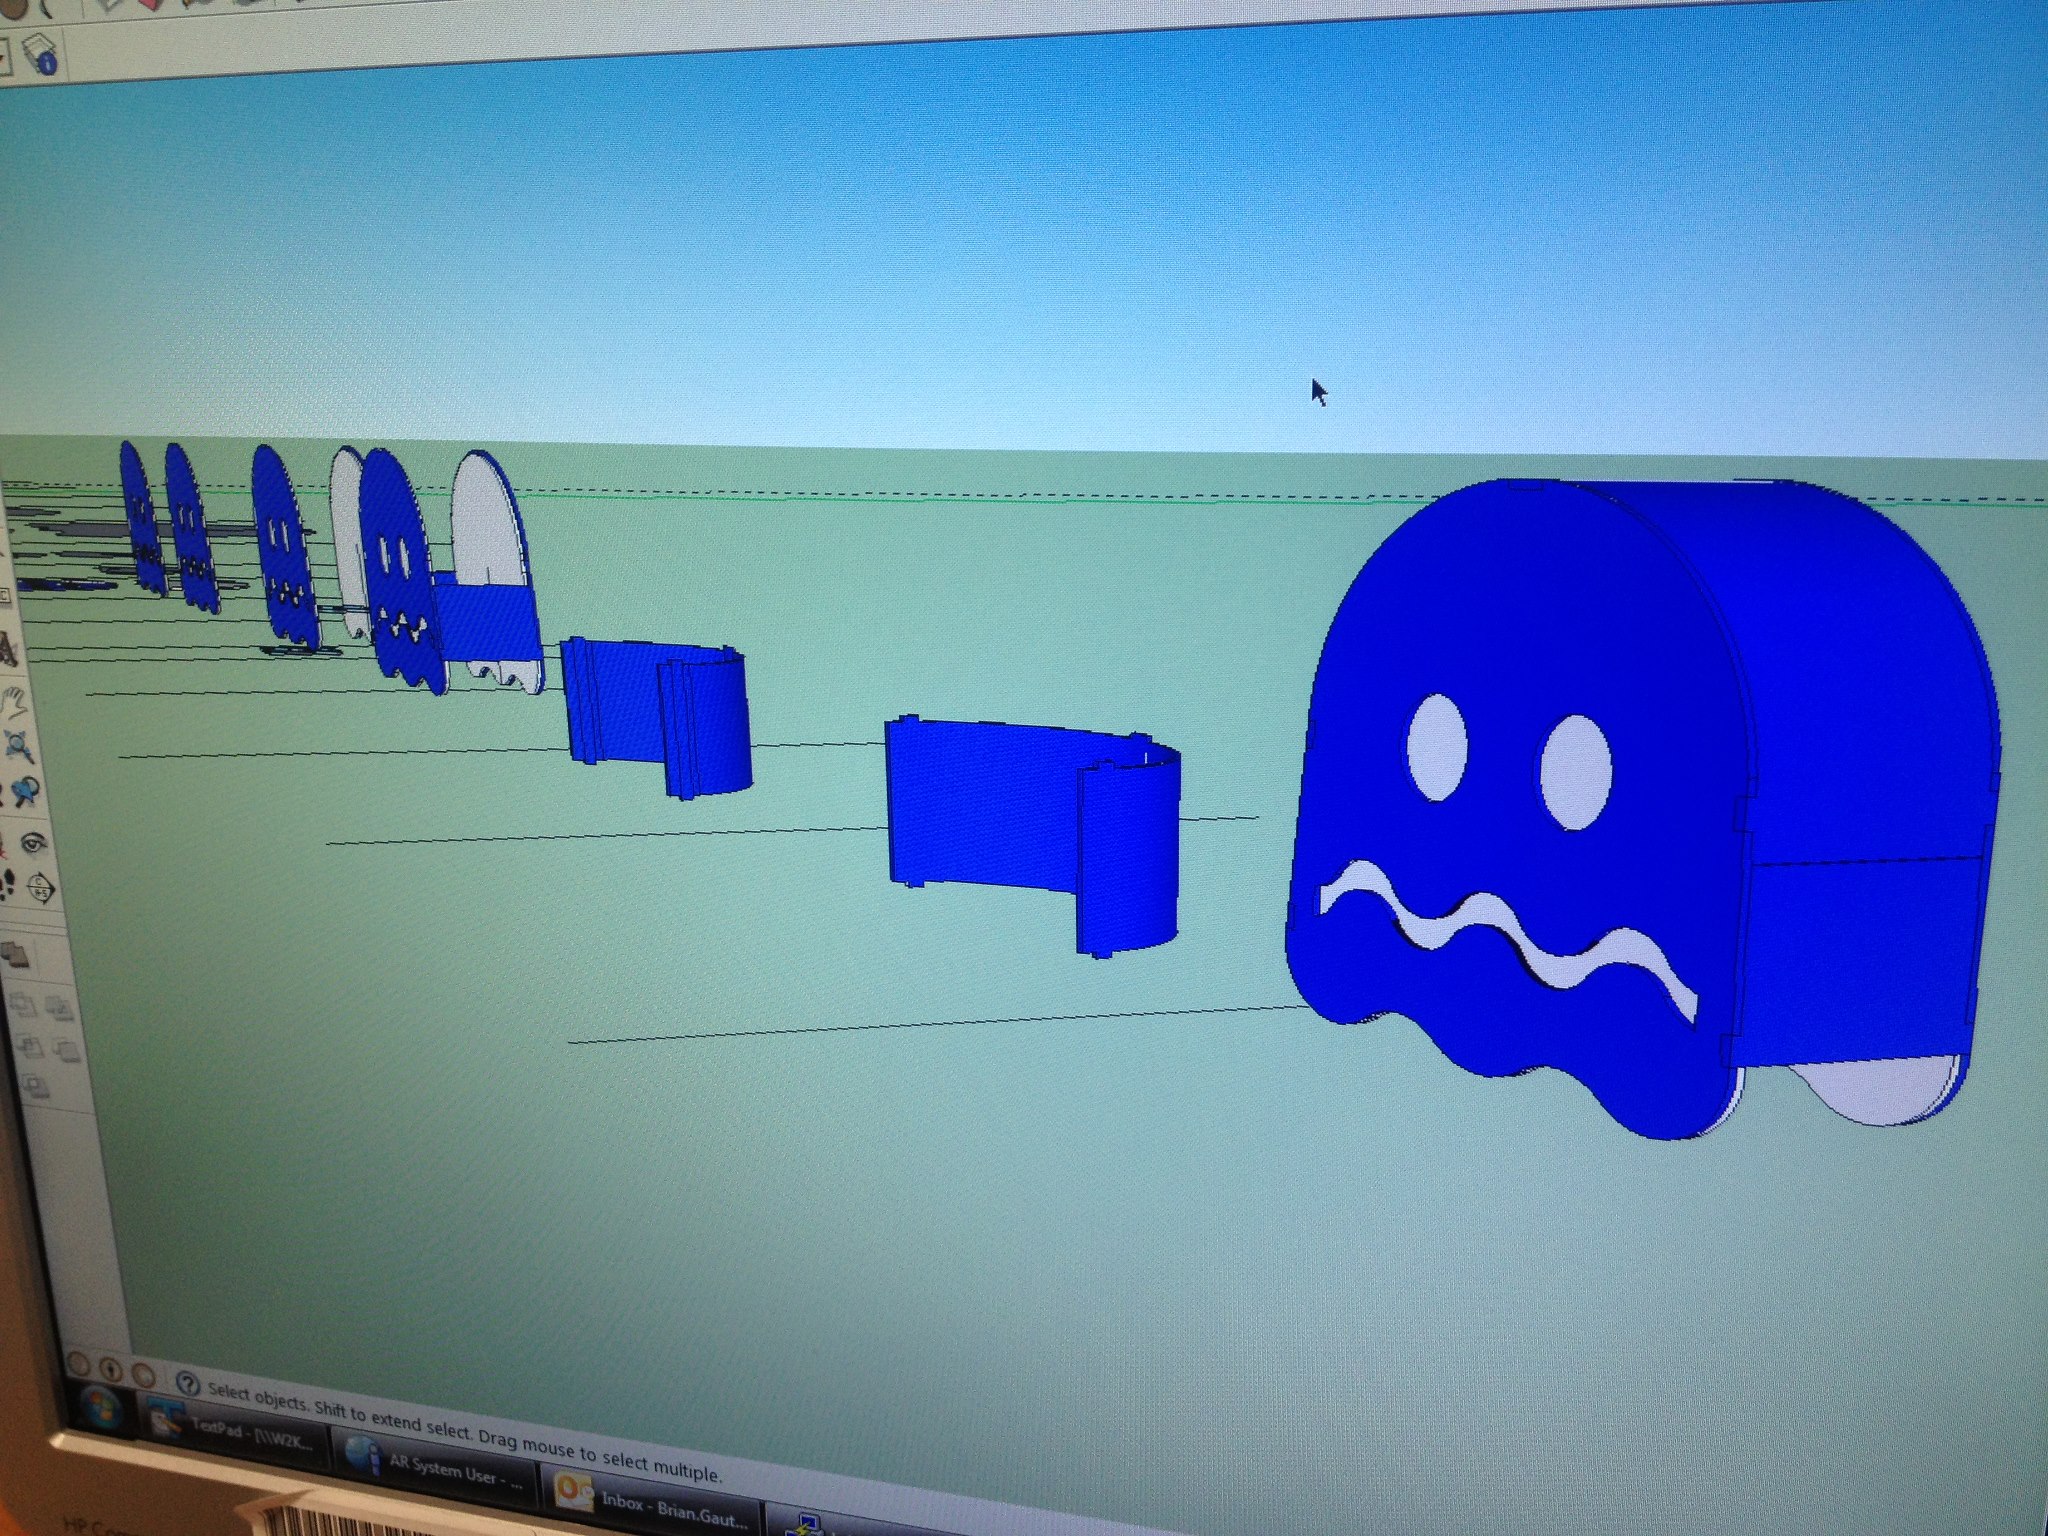
I wanted to build some PacMan Ghost lamps. The only problem was that I needed a nice, curved piece of acrylic for the top “hat” piece.

919053_10151370946380108_1126631867_o

I created a bunch of thin pieces out of wood and bolted them together to make a mold for the acrylic. Then I placed it into the oven and let it heat up completely. The melting point of acrylic is around 320 degrees Fahrenheit, so I set my oven to 350.

941651_10151377709020108_33754604_n

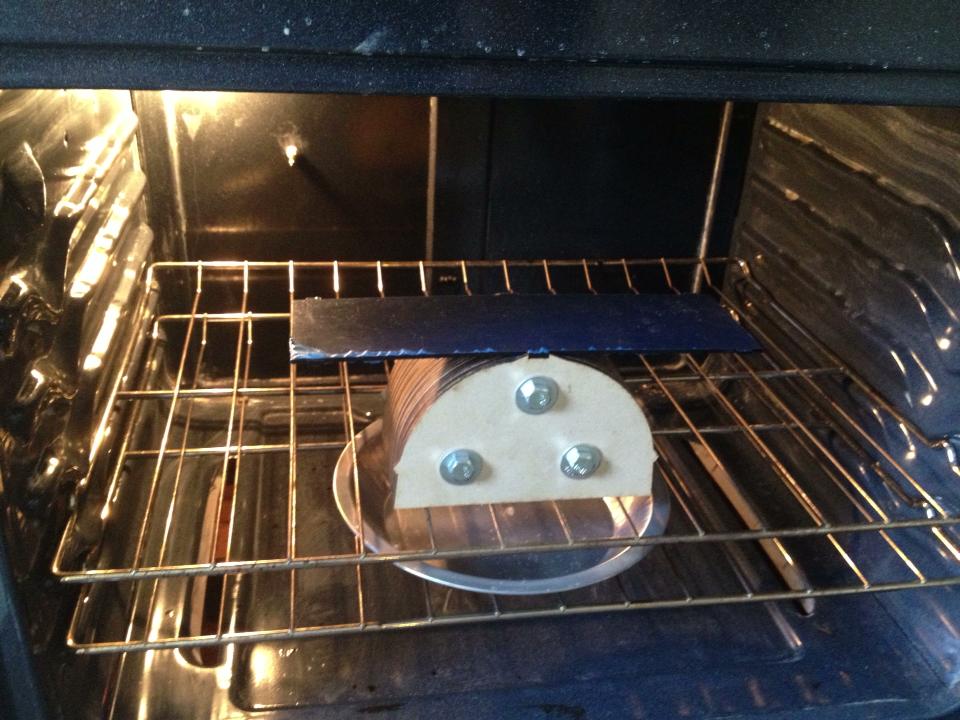
After about 10 minutes or so, the acrylic drooped over the mold just how I wanted it to. I used something round to push the acrylic into place. In retrospect, I should have made another half  of the mold; a top. But it took a LOT of time to make the bottom half, and I was getting impatient, haha. Also, I think having a top mold may have left a bit too much marking on the acrylic, making the finish non-smooth and shiny like I needed.

164267_10151377780540108_78902775_n397931_10151391726375108_1641157629_n

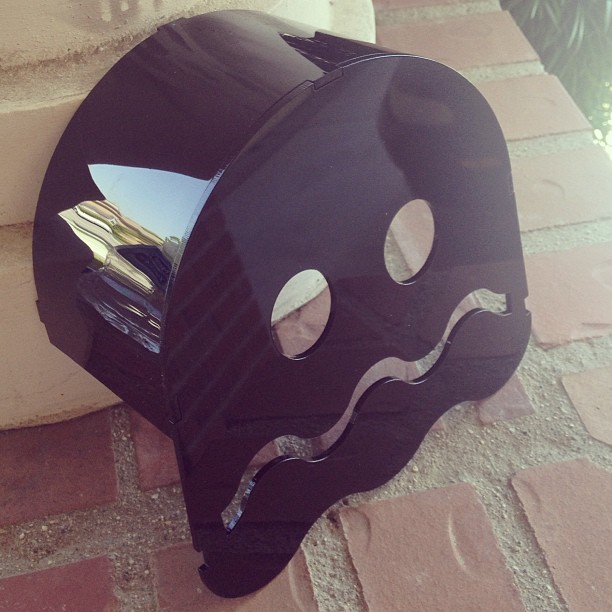
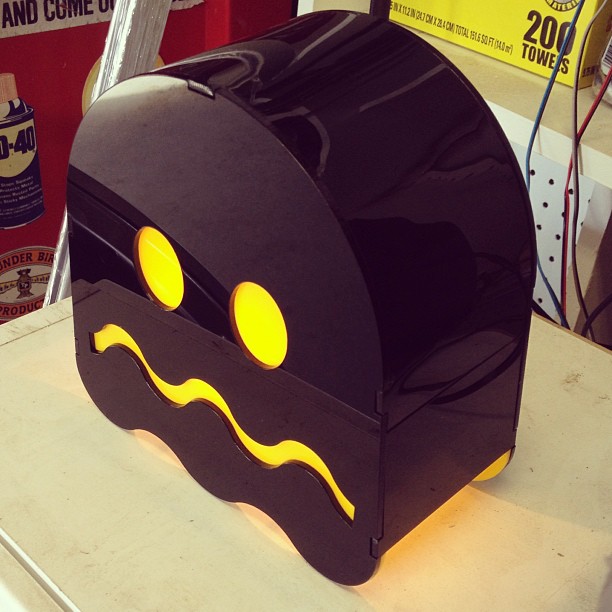
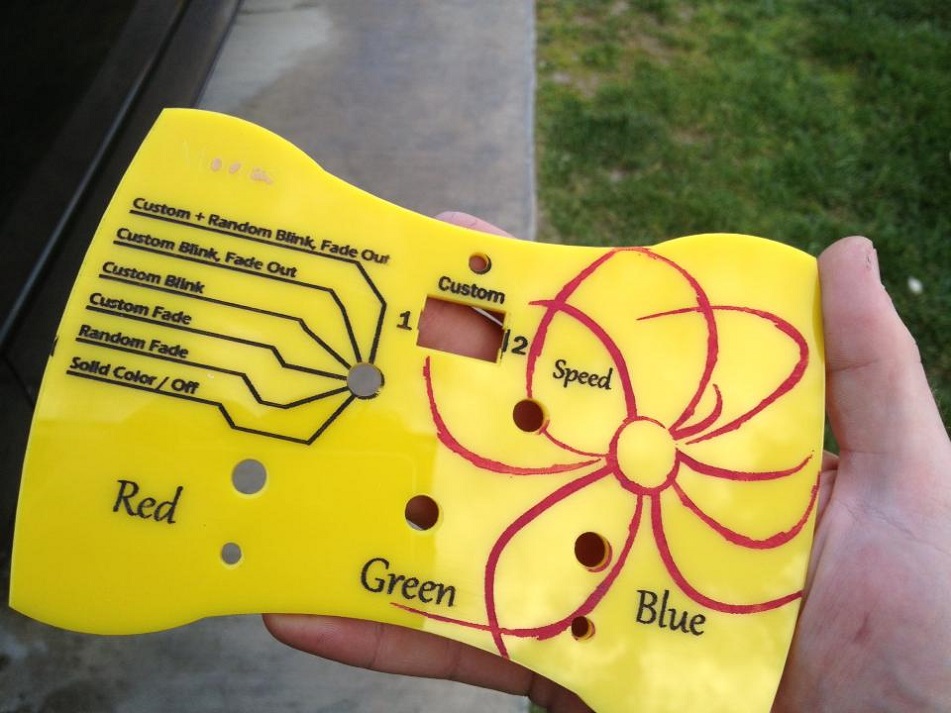
(Note: Yes, I later made a blue and white ghost – black and yellow just happened to be the color of acrylic I had plenty of at the time)

Design prototypes with room

Reminder to self: when designing prototypes, make sure to leave room to stuff all those breadboard wires.893772_10151310019600108_1442718155_o544193_10151314164715108_1770484238_n

On another topic, this was my first attempt at colorizing a laser-etched piece of acrylic. It came out better than I had expected.

I laser etched a design (and text) pretty deep into the plastic, with the protective paper still on the top. Before taking the covering off, I brushed some acrylic paint over the scores and let it dry. Once dry, I simply peeled away the covering and was left with this.

68539_10151345413320108_2027524815_b

Spiffy Product Packaging

While selling the Look of Disapproval Glasses, I have been having a couple recurring problems. One problem was the brittle nature of acrylic mixed with the man-handling nature of the post system causes a lot of broken sets and upset customers. Too frequently I was getting emails saying the glasses had arrived broken. I would of course replace them as soon as I had heard, but that left the original issue unresolved.

Another issue was that the 3-piece glasses set just doesn’t want to sit nicely in any way. Sure, you could just wrap them in a folded piece of paper, or tape them to something, but not only does that look just downright unprofessional, but it could cause damage of its own to the acrylic. Tape could leave glue on the plastic, making a marred product.

So I set out to fix the issue. What I finally came up with pretty much fixes both of these issues, and gives a tasteful touch to the out-of-box user experience as well.

The cardboard holder seen here has the same basic shape as the glasses parts, but with divots spread around, designed to grip the plastic. This holds them in the recesses, while still allowing them to be popped out with ease. The orientation of the corrugation in the cardboard is definitely taken into account. Having the corrugation go the same direction as the longest pieces reduces the chance of bending on the axis, which overall reduced the chance of the glasses breaking.

I also get a blank canvas to customize with my own messages, as you can see 🙂

If you’d like a pair of the glasses seen above, you can find them at The Plasmatorium

Skull

It took quite a few steps to get this end result.

It all starts with a 3D model of a skull which I found online. It was manipulated in Blender to get a model I liked. Once I had it the way I thought would be best, I then exported that to Autodesk to slice up the model into intermeshing sheets.

The slices then had to be exported to a PDF, since that was the best way to get to the next step; Inkscape. After importing each page of the PDF into Inkscape, as a new document, I was able to manipulate the actual paths of the slices. This let me label each piece, and lay them out onto documents that were sized for my specific laser bed.

Only after each of those steps were completed, was I able to cut the pieces and put them together… only to find out that I cut the slices to small. Back to step 1 🙂


After all was said and done, I finally had my cardboard skull, which Ive been wanting ever since I got the laser cutter. Mission Accomplished.

How I built my photo booth

Just like most of everybody else who builds a photo booth, I am making mine for a wedding… and just like them, it’s for my own wedding. I was planning on putting the booth into my game room after the wedding and using it with friends during parties and what-not… Apparently photo booths are also the latest craze in weddings right now, so I decided to make it good enough to rent to others to enjoy at their events. Below, you can see how I started, and ended up building my booth, which has now been named the Best Shot Photobooth.

Let’s skip ahead into the build by a couple weeks. Here you will see the basic structure of the booth, which is plywood put around a 2×4 frame. The front face has been routed out with beveled edges to give smooth, rounded corners for the camera, lights, and computer monitor.

I haven’t been following anybody else’s design or layout, but instead just going off of what I think of when I picture a classic photo booth.

The component part is big. It’s big on purpose. Why? Because that’s what the older photo booths looked like. They had to have all that photo processing equipment in them. I wanted my booth to resemble what I’ve grown up to know as a photo booth. My design isn’t the most space efficient, but I’d rather have it this way than a skinny kiosk-type booth. Dont get me wrong, those are just fine, but I want this in my house at some point, so I get the final say on the design 🙂

The entire booth comes in 4 pieces. The computer component side, the seat, and the roof + floor. The floor latches from the insides to the other 2 components and the roof gets bolted down with wing nuts. This is what makes the entire setup portable. Granted, it’s made out of wood, and therefor pretty heavy… but it’s still easily managed with a dolly.

Anyways, I decided to stain the entire booth a nice mahogany color.

Unfortunately, I was finding it difficult to get a good color scheme figured out.  Black kind of worked, but it’s a bit boring. The gray and silver below didn’t work at all, but I was more or less just testing with what paints I had in my garage at the time.

(more…)

Lazor Blades

It’s usually a pleasure to work with my laser cutter, but as with most things, there are a couple annoyances here and there. One thing is the honeycomb table that came with the cutter.

While it does a great job at holding up a work piece, and usually keeps from marring the material, its giant borders can get in the way pretty often. If I try to cut anything while it is resting on the border, on the underside of the material, it will get way too hot and end up melting or burning the piece.

Since I couldn’t move the borders any further, I decided that I needed a different solution for holding up a work piece, while still having a small enough footprint on the piece to let the laser beam go over it without marring the material.

In the industry, there are basically only a couple standard ways to do this; honeycomb tables, and knife edge tables. I didn’t exactly want to lay down the money to buy a knife table, but figured I could instead make my own with some simple razor blades. This is the result.


These little guys are perfect for me for a few reasons. For one thing, they are movable. I can place them under any part of a work piece, without having to worry about it being in the way.

The actual Lazor Blades (the wooden holders) are set about half an inch below the work surface, so that means by the time the laser beam hits them, it is unfocussed and will not totally cut through them. As you can see in the photo below, they do, in fact, get marred by the laser. I was expecting this to happen, and for that reason, I pretty much classify these as a dispensable consumable. Whenever the ones I have get used up, I just cut some more. It works out pretty nice 🙂

If you want some Lazor Blades of your own, make sure to grab the file from Thingiverse and cut some out!


PS: They’re great for all kinds of things, not just lasers! For example, spray painting, as seen above