Designing the Doctor Who Tardis lamp

The Doctor Who Tardis lamp is one of the most detailed pieces I have designed yet. It pushes the boundaries of what my laser cutter can do to a flat piece of plastic. It features some of The Doctor’s greatest enemies on the sides, while showcasing the Tardis falling through spacetime on the front.

Projecting images onto walls has become a staple of most of The Plasmatorium’s lamps. Some work better than others, though.

1

Just like most other creations, it all begins with a crude and simple sketch.

(more…)

Turning the Blender Defender into a product

One of, if not THE most popular installation I have done would have to be the Blender Defender. If you have not heard of it yet, please take a second to click and check it out. To sum it up, it keeps the cat off the counters by turning on the blender when it detects motion, and

blender_defender

While many people still enjoy reading about the project, and seeing the videos, I still randomly get a user ask me if they can “buy it”. The problem is that the Blender Defender is not really a set-it-and-forget-it type of installation. Nor is it one piece of hardware that is easily set up by the average owner of a counter climbing cat.

I’ve been toying with the idea of how I could manage to make the Blender Defender into an actual product in the past, but it has always just been thrown around with all my other ideas, never really coming to the front of the line.

Now, after some encouragement from others, I have finally decided revisit the idea, and obtain some parts from Newark.

newark-element14-logo


Over the course of these posts, I will be documenting my processes of making a product out of a concept. A video recording, motion detecting cat deterring device may not be something you find on the shelves at your local store anytime soon, but the exercise in building this is going to be a fun one.

Now, on to the concepts.


Requirements.

These are the basic requirements of what I need to see with the Blender Defender.

  • Portable
  • Easy to use
  • Plug and Play
  • Safe
  • Records Video
  • Detects Motion
  • Controls an Appliance


Portable

I need to be able to put one single thing into somebody’s hands. That will be the Blender Defender.

Easy to use

The target demographic here is not technologically savvy users; it is cat owners who like to laugh. I need to package this in a way that any user can figure out. The instructions of use should be easy to understand, and it should be difficult to break. (Technologically speaking, not physically)

Plug and Play

Once you plug in the Blender Defender, it should start working. Simple as that.  Sure, you CAN change settings or other things, but you shouldn’t need to.

Safe

This is going to be controlling kitchen appliances, and will be switching mains voltage. It’s easy to do, but if done wrong can be fatal. Safety will definitely need to be taken into account here. Also, while on the subject of mains voltage, this one thing could be the main thing keeping me from making this a marketable product, as there are laws and regulations that I will need to look into. Certifications can be expensive.

Records Video, Detects Motion, and Controls an Appliance

These are the absolute neccessities of a true Blender Defender. Motion controlling relay switches exist right now, and sure, they would work for controlling a blender, but you don’t get the videos for later viewing. Motion detecting cameras exist, but you don’t get relay controlling, which defeats the purpose yet again.


Stay tuned to the next few posts, where I will be going over the expected challenges, design concepts, and build progress.

Skittles Vodka & Display Case

Gave this as a Valentine’s Day gift

ZivVizV

As soon as I learned that her favorite candy was Skittles, and that her favorite alcohol base was vodka, I knew exactly where to go from there 😛


Step 1: Get your crap together, man

x4a0uZ6

Found the bottles on Amazon… a lot more expensive that I had hoped, but oh well. She’s worth it. As per the alcohol, I knew you shouldn’t buy an AMAZING vodka, since the candy would be ruining your vodka (like ketchup on filet mignon)… but I certainly didn’t want to get bottom shelf either, since that would taste just as bad… Svedka is a good choice 🙂


Step 2: Piss off those with OCD

b2FBhJu

Separating the candy was the fun part… and no, I most definitely did not eat any…


Step 3: Start the liquification!

3iWMS3T

Water bottles were used, so I didn’t get any candy gunk on the inside of the nice expensive bottles


After about 10 mins

RnjOdXl

10 minutes in, the color was already becoming quite vibrant. I let them sit for a few more hours to let the candy COMPLETELY dissolve.

(more…)

Beating Stacker with the Stacker Cracker

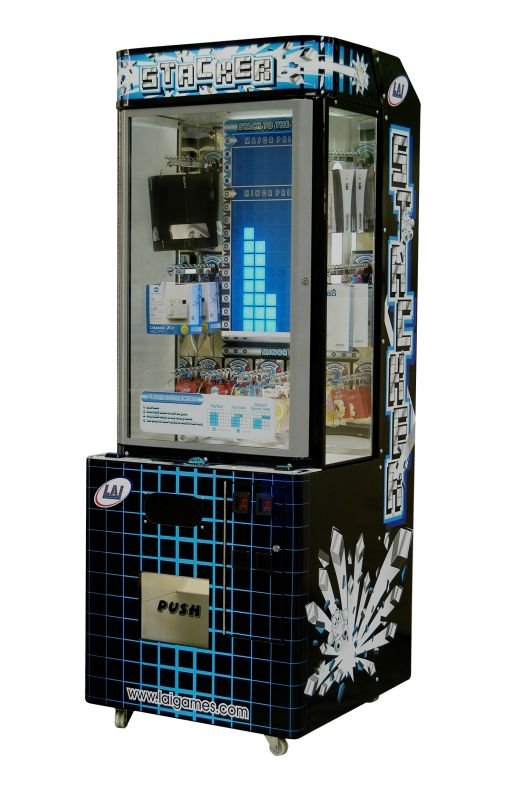
You’ve most likely seen the arcade game, Stacker before. The concept is simple; stop the blocks as they move side-to-side, stacking them to the top. Easier said than done… well, at least with the timing of a human.

Stacker_Club

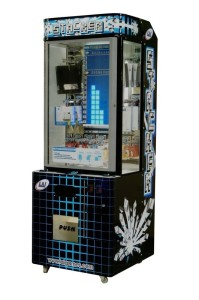
The allure of easily winning a Playstation for about $1 can rope just about anybody into playing, but as they quickly find out, things are never as easy as they seem.  Humans are horrible at tracking time. Every person even has their own definition of the passage of time. Game makers know this, and they use it to their advantage.

But what about machines? They can operate with an exact definition of what time is, and be able to correctly count it time after time. If you want to win against a machine, you’re going to have to use a machine to fight it for you.

This is where the Stacker Cracker comes in. It was my attempt at making a robot that could take care of the timing and repeatability for me, that way I didn’t have to rely on my inferior human abilities. The Stacker Cracker consists of a microcontroller (Arduino), some hefty batteries salvaged from a drill, controls, an LED counter, and a solenoid.

326226_10150289085360108_1457998373_o330544_10150290143120108_1556664907_o324516_10150294595095108_2037598392_o339691_10150294595715108_1604865020_o

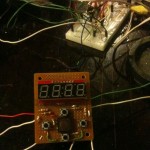
Using the Stacker Cracker was simple. You placed the solenoid over the main button of the game, flipped the switch to “Record”, then pressed the trigger button. The solenoid would fire, hitting the button on the game and causing the row to go to the next level. You then hit the trigger again once the lights were at the correct position. The solenoid would hit the game button again. The LEDs would display the exact number of milliseconds that have passed between the two button presses.

That is exactly what you need. The amount of time needed between pressing the button. Write it down. Keep repeating this process, until you inevitably show your human side by failing this reverse Turing test and fail. You may have lost the battle, but you are now armed with some VERY important knowledge which will win you this war.

Put another dollar in the machine, and now flip the Stacker Cracker to “Playback” mode. You are now able to enter the amount of milliseconds that the machine should wait. Enter what you wrote down from before, but ADJUST your last failed time and make it either shorter or longer, depending on how you messed up. Assuming you adjust it correctly, all you need to do now is press the trigger button.

Once you hit the trigger, Stacker Cracker automatically hits the machine button, wait until the exact amount of specified milliseconds passes, hits the button again, the repeats the process, all the way up until you have no more data… at which time, you flip it back to record, and keep going.

In Practice


Well that all just sounds too good to be true, right? Well…. it is. But wait… yes, it’s bad news, but not all hope is lost. Hear me out.

Why it won’t work

The creators of Stacker did not create their game with the intention of losing money. So they made sure to cover their bases. What does this mean to you? Well, upon researching the Stacker operator manual, you can find the instructions for payout percentage. Yes, you read that right; the arcade owner gets to decide the odds that somebody will win. It’s not that black & white though. What that payout adjuster is really adjusting is the final dice roll. Yes, that’s right: if you play perfectly, you then enter a random dice roll to see if you’re allowed to hit the jackpot. If you fail the dice roll, the game will instead “nudge” your block to the right or left by one block, making it seem as if you messed up – even if you hit it dead on.


So there is GOOD news?

Re-read that bold line above. Emphasis on the “if you play perfectly” part. Now replace “you” with “the Stacker Cracker”. Get it yet? Yeah, I knew you would. All you have to do now is keep playing the game, letting the Stacker Cracker get you to the top every time. The game will make it seem like you keep messing up – but we both know machines are excellent bean counters, and in reality, you’re most likely failing that random dice roll, rather than actually failing the block. All that’s left to do now is keep paying, dollar by dollar until you hit that big prize… which is hopefully a lot sooner than how long it takes to pay for more than the prize is worth.

…and that is why I never won anything with The Stacker Cracker. It turns the Stacker game into a slot machine.


Mario Star Tree Topper

I modeled up another lamp; a Super Mario Brothers Star lamp. Aka a Super Star 😛

1483767_10151754630220108_1030040446_o


But I also wanted to make it as something that could be put on top of a Christmas tree, so I added in support for that!

marioStar3d

The Mario Star definitely takes a bit more effort to assemble than the previous Zelda Triforce Lamp, but it’s worth it. It also looks pretty awesome on top of the Christmas Tree 🙂

1404779_10151745661730108_708651953_o1452326_10151764975865108_386676047_nil_570xN.536305676_j80fI also created some assembly instructions for attaching the tree-holder to the lamp, which I include when people purchase the lamp. I thought they came out pretty interesting. Almost Ikea-style.

1403534_10151766789615108_943658086_o


If you want to check into getting one of these lamps for yourself, I should have it up for sale at The Plasmatorium – go check it out!

Upgrading a hobby CNC router

It all started with a nicely-priced purchase of a ShapeOko CNC router from a member of one of the hackerspaces who had no use for it. It was still new in the box. First step was to put it all together as it should be.


Parts in box
b941748_10151476789700108_1512297115_b

Have to tap some aluminum rails1044949_10151477256505108_255138531_n

X-gantry pretty much finished1003432_10151477355595108_1216377778_n

A completed, stock ShapeOko CNC milling machine, minus the rotary tool1016250_10151484535380108_106536218_n

One of the first upgrades was replacing the motor mounts on the sides, upgrading the metal plates and moving around the belts.

622878_10151650060110108_1212593139_o

Several upgrades (and missing pictures) later, we have this:

1272691_10151650371395108_630911476_o (1)


Some planned upgrades yet to come:

  • ACME Screw upgrade for Z Axis
  • Doubling up on the aluminum extrusion across the X plane for enhanced rigidity
  • Framing entire table with 80/20 aluminum extrusion
  • Cable chains across axis for wire managment
  • Spoilboards and clamp-down solutions
  • NEMA upgrades
  • Many more