The Emergency Party Button began as a novelty idea that has become the focus of every event that goes on in our home. A big red button is, by human nature, an object of compulsion. If you see it, you are overcome with the desire to push it. But what happens when you do?
Details
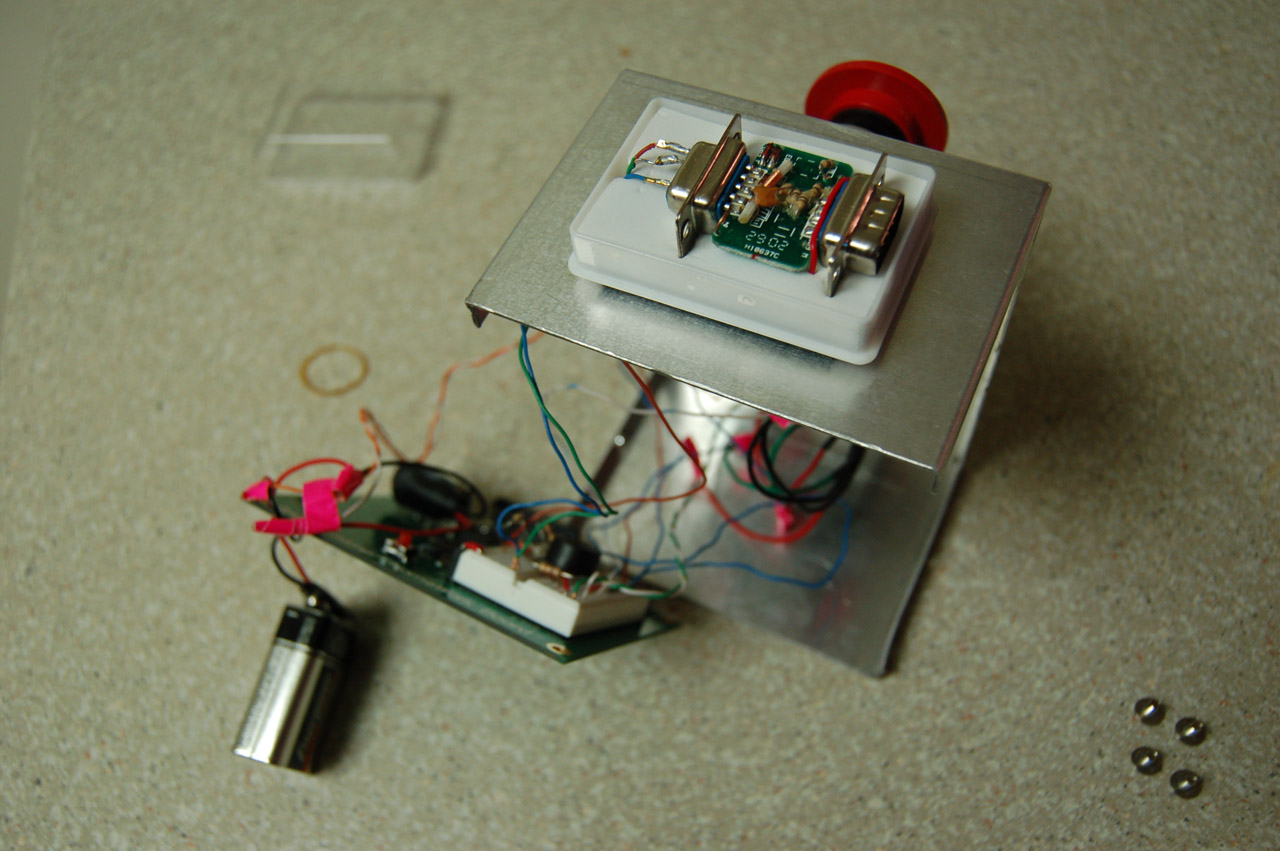
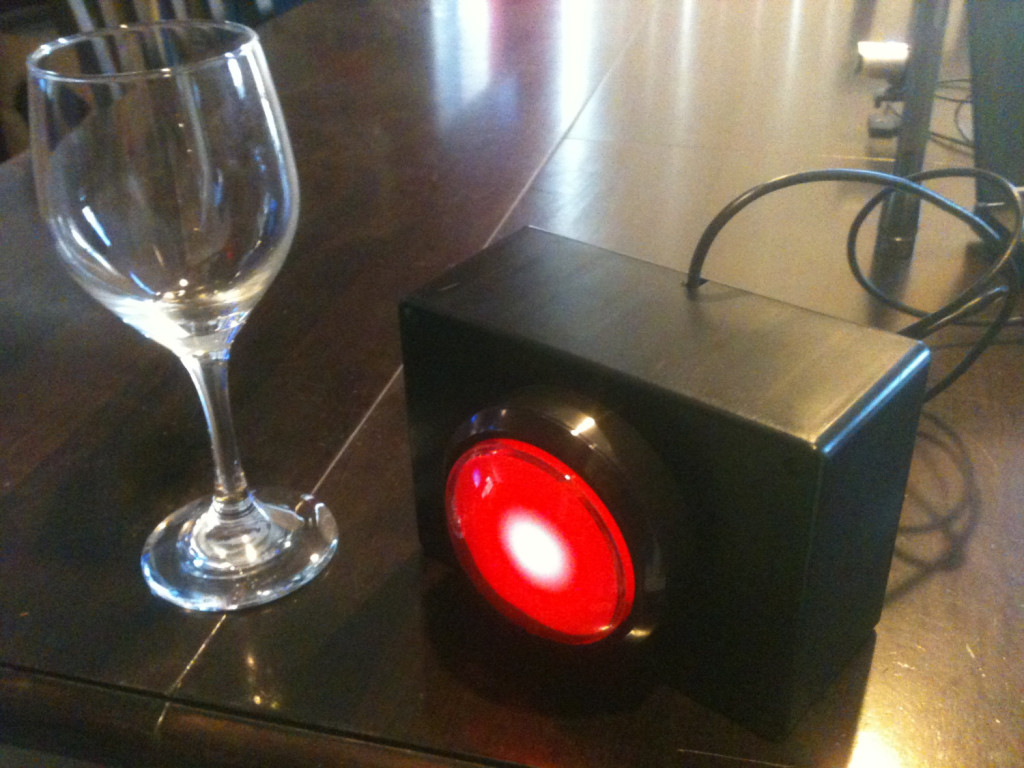
The Emergency Party Button consists of 3major components: The actual button itself, the controlling computer, and all the controlled devices. The button itself is the only real piece of equipment that any user is interacting with, which is why it has to be the best piece of the entire set up. Aesthetics is key. I did not want to buy a premade button box. I had a perfect idea of what I wanted, so there was only one thing to do; build it myself.

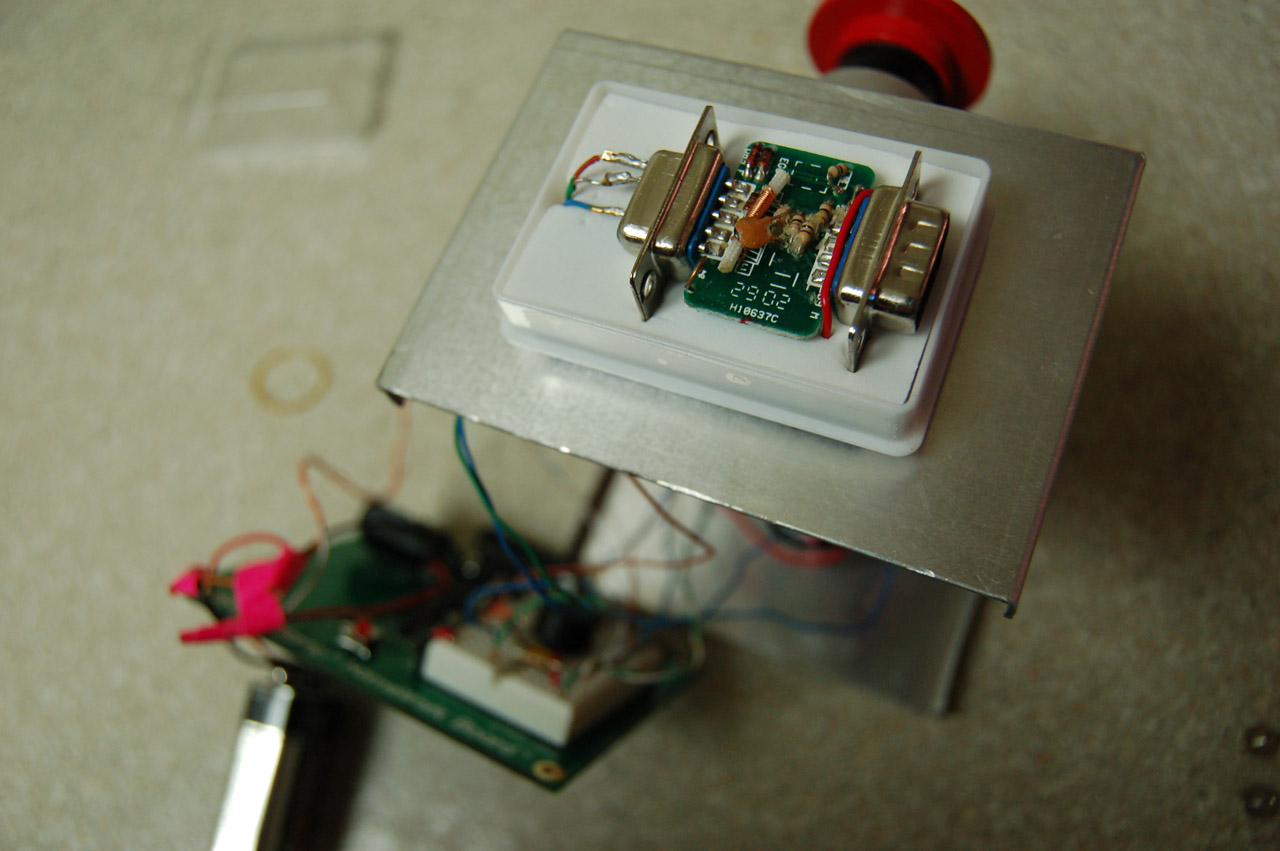
 The main visual aspect is of course the giant red mushroom button. I had to buy this online since I couldn’t find the right looking button in any electronics store around. It cost a lot more than I had first planned, but it was well worth it. I bought the button from AutomationDirect.com. Check out the parts list page for a cost breakdown.
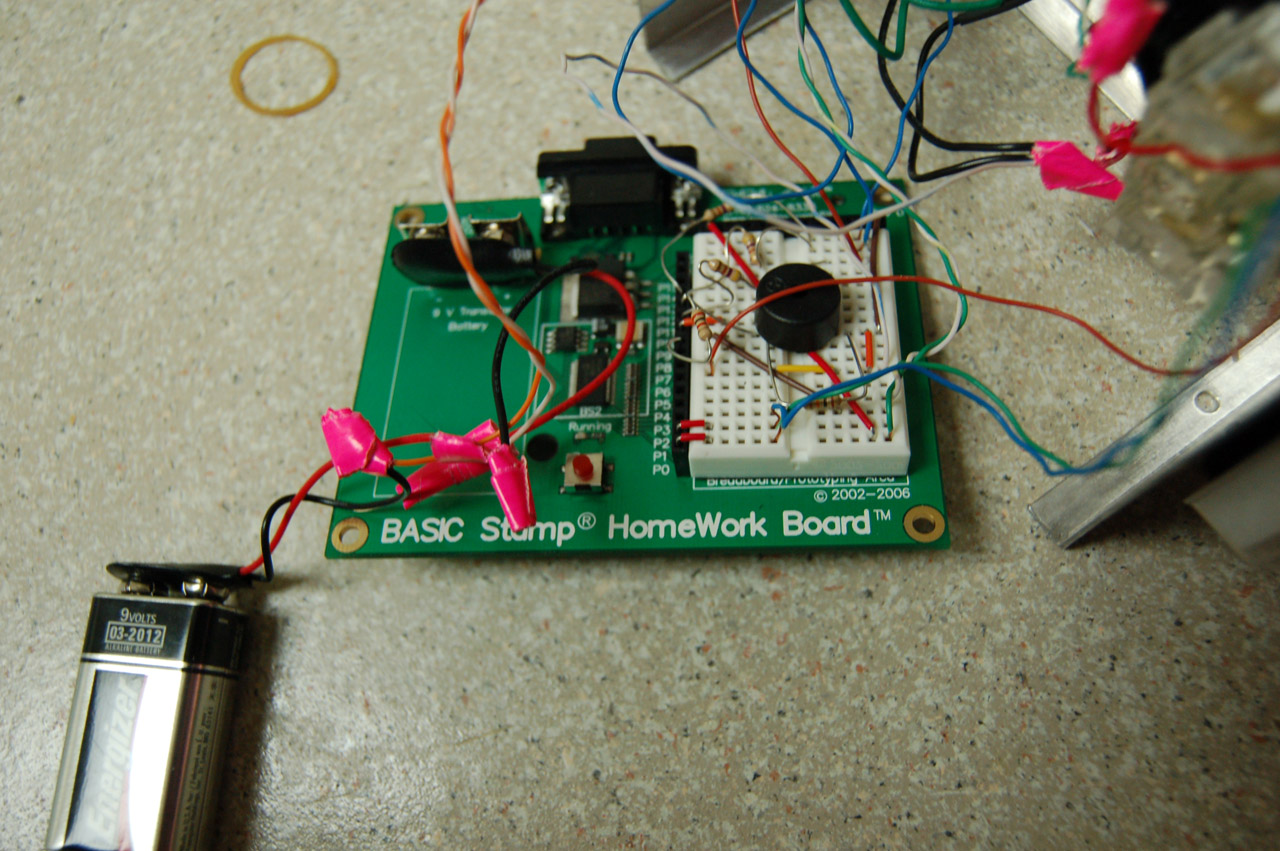
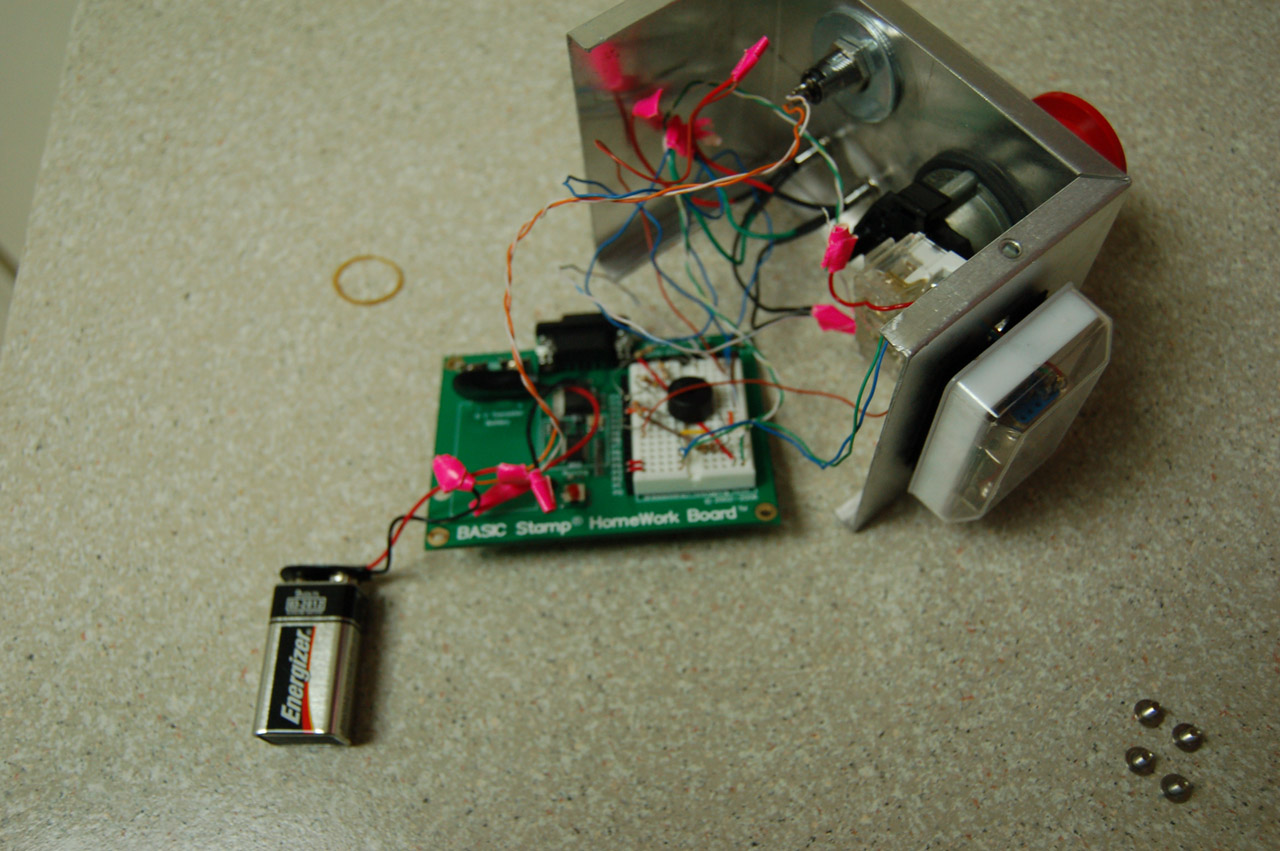
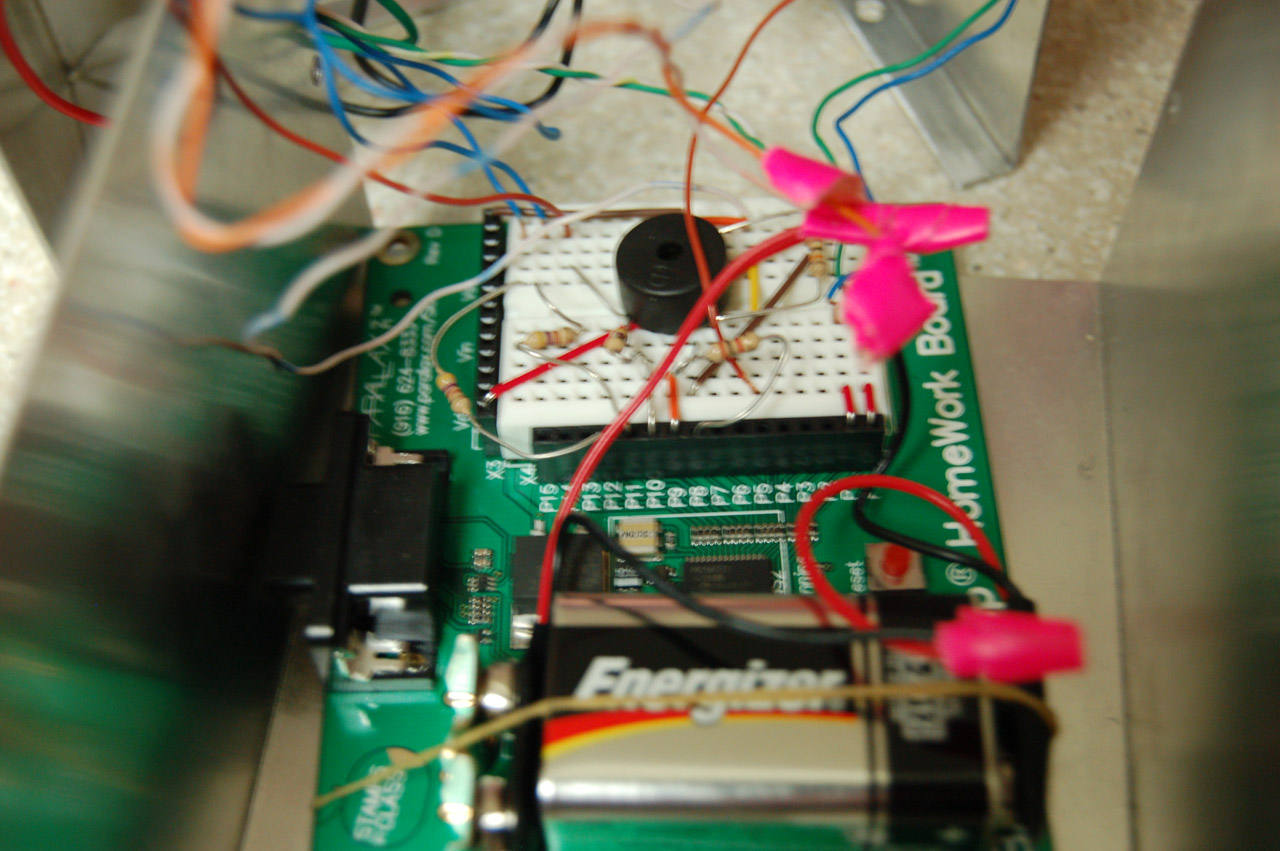
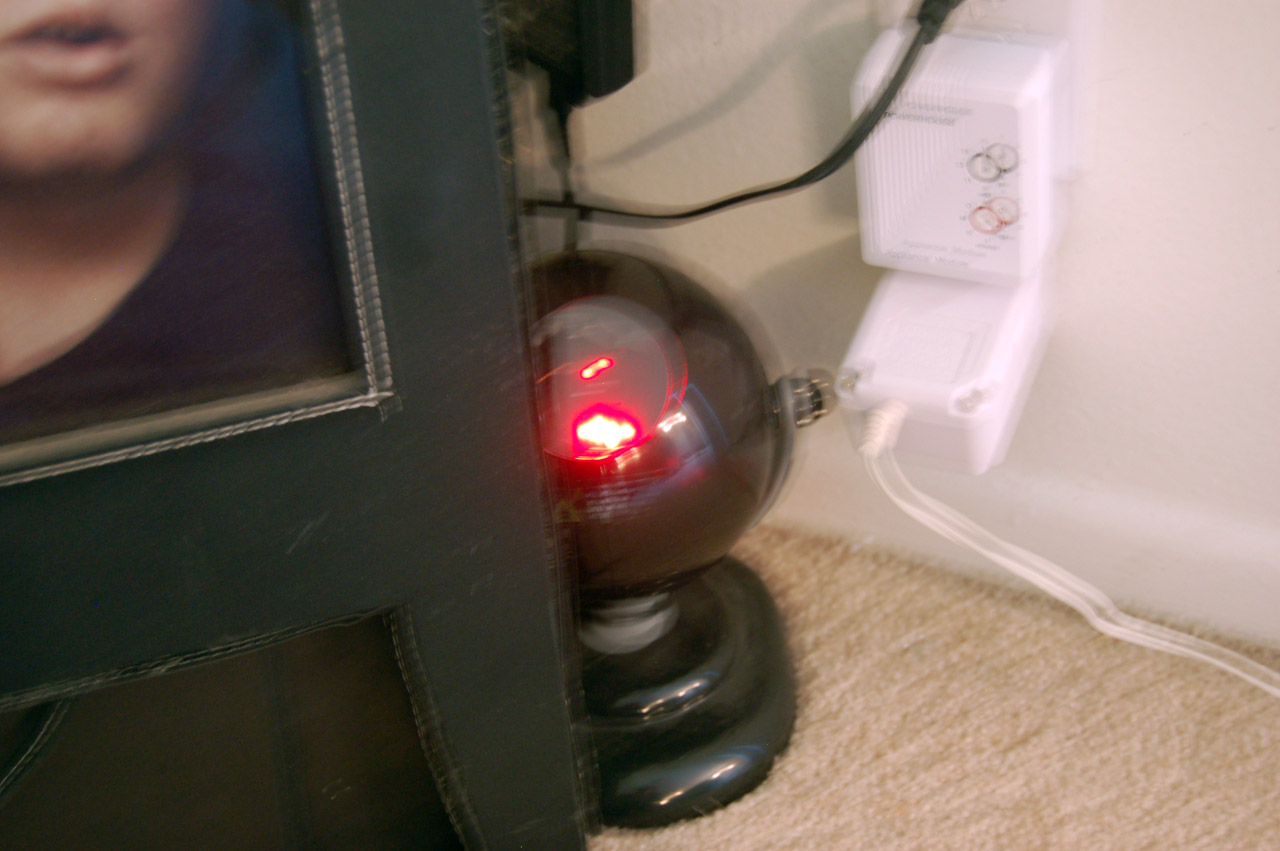
At the heart of the button is a Basic Stamp II (well, technically, a Basic Stamp Homework Board, since it wasn’t going to any good use anyways). The basic stamp is used for a few small things. Once power is applied by turning on the key on the top of the button box, the basic stamp waits until the button is pressed. Once it is, it first plays a short tune on a piezo speaker to signify that the button has been pressed, it turns on a red LED showing that party mode is currently on, and then it uses the Firecracker X10 module on its serial line to send an X10 signal to the transceiver plugged in across the room. Click the images to enlarge. Also, please forgive the crappy pink duct tape holding the wires together, as I didn’t have access to a soldering iron when I wired it up.

********* Once the X10 transceiver receives the wireless signal from the party button, it then forwards it out towards a computer that is always listening for the signal. Once it detects the signal that the button was pressed, it then runs a script which starts the party initiation process. The process is as follows:
- Turn off hallway light
- Close the blinds
- Turn on the fog machine (Takes a while to warm up)
- Turn off the kitchen light
- Turn off the poker light
- Turn off the living room lights
- Start the mp3 (Haddaway – What is love)
- Turn on the blacklights
- Turn on the laser when the main beat of the song starts
- Turn on the strobe light when the chorus starts
Once the party has started, at any time the party button may be pressed again. This will turn off the red LED, play a simple tune to signify that the party is stopping, and it will send another signal. Once the computer detects this signal, it will basically run the same script to turn on the party except it will turn the party equipment off and the lights back on while stopping the music. When you turn the party on, things are timed and ordered for maximum effect (such as the strobe turning on when the chorus comes in), but when the party is being stopped, the music stops and the lights come on almost immediately.
UPDATE! Did you know I now make and sell a custom USB button that you can use to create your OWN emergency party? It’s called the Smarty Button! It can literally control anything you want it to 🙂
Devices
Blacklights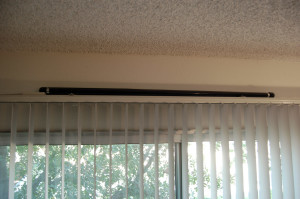

There are 2 blacklights: On on top of the entertainment center and one on top of the curtains. One simply wasn’t enough to light the entire room. Both blacklights are running on the same X10 switch with extension cords. One problem I had with the blacklights was the fact that florescent lights have always given problems with X10 appliance modules. The appliance modules have a ‘feature’ that turns the device on if it detects that it has been unplugged and replugged in. Apparently the high voltage ballast in florescent lights interferes with this though. When i tried to shut the blacklights off, they would stay off for about 2 seconds, then turn right back on. To remedy this, I found a tutorial online that showed how to disable the ‘feature’ in the X10 module. Basically it involved cutting a few leads on the circuit board. Once they were cut, the blacklights worked perfectly
Living Room Lights
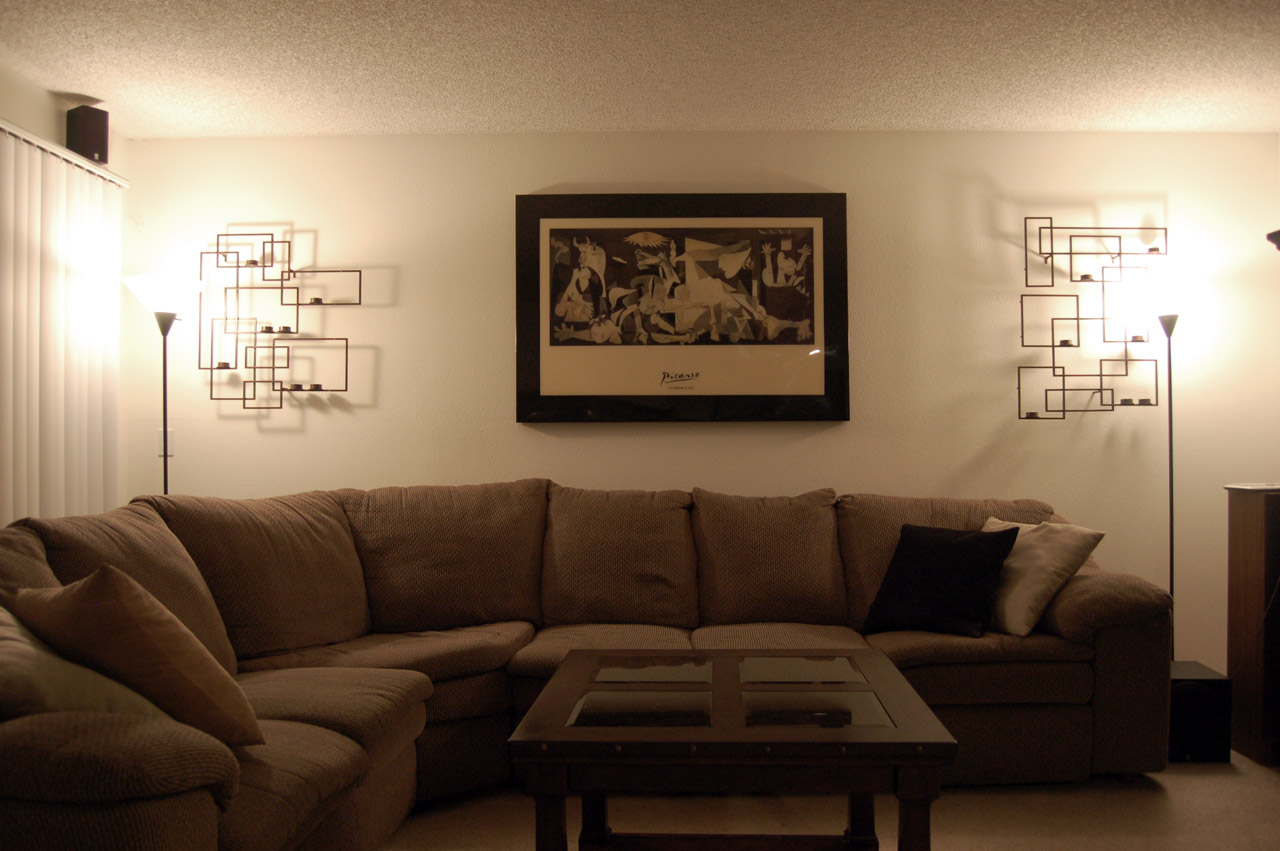
The two standing lights in the living room weren’t necessarily a challenge, but they were a pain. That entire wall of the apartment was apparently on a different circuit or something, because no X10 signals could ever get to those outlets. So basically what I had to do was run extension cords all around the place to get to an outlet that the signals could get to. Like the blacklights, both lights are plugged into one X10 module. This just makes things easier and better looking. (It looks way better when both lights dim down at the exact same time)
Poker Light
Why do I call this a poker light? Simple, it’s over the poker table. My other half likes to call it our dining table, but I don’t think I have ever eaten anything on that table since we bought it. Anyways. The poker light is simple a light bulb inside a shroud on the ceiling. If I were to install an X10 Socket Rocket, the kind of module that screws in between the bulb and the socket, then the bulb would be sticking out of the shroud, looking horrible. That is why I decided to instead install a switch panel module instead. The unit sits behind the faceplate of the light switch. This also lets us turn the light on and off by using the actual switch instead of solely X10 control.
Hallway Light
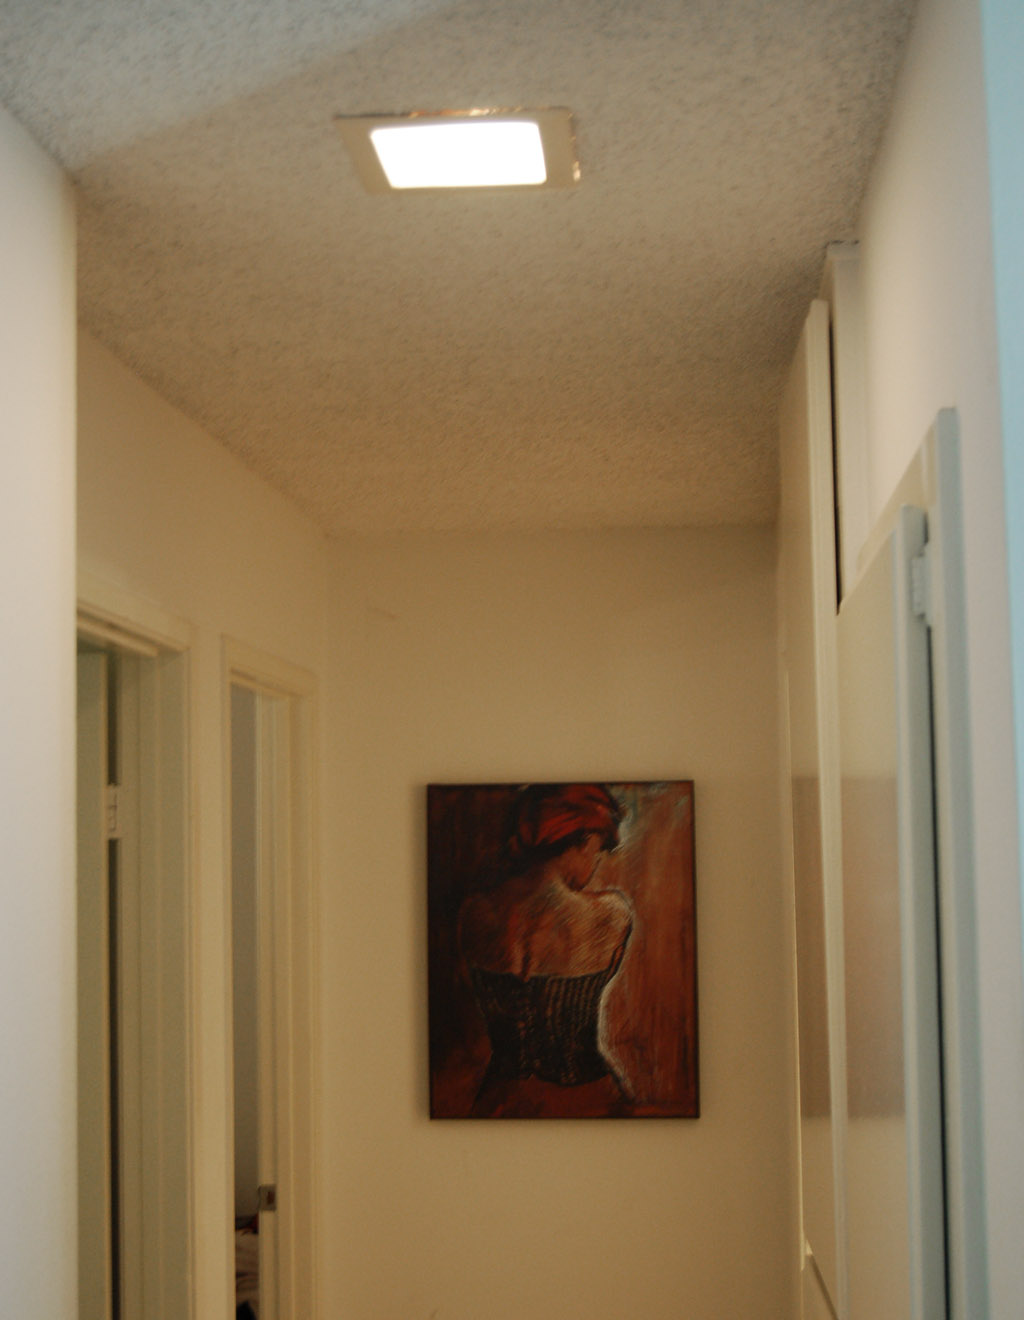
The hallway light is exactly like the poker light in the fact that we installed a panel mounted module. Other than that, it’s just another boring light in the ceiling.
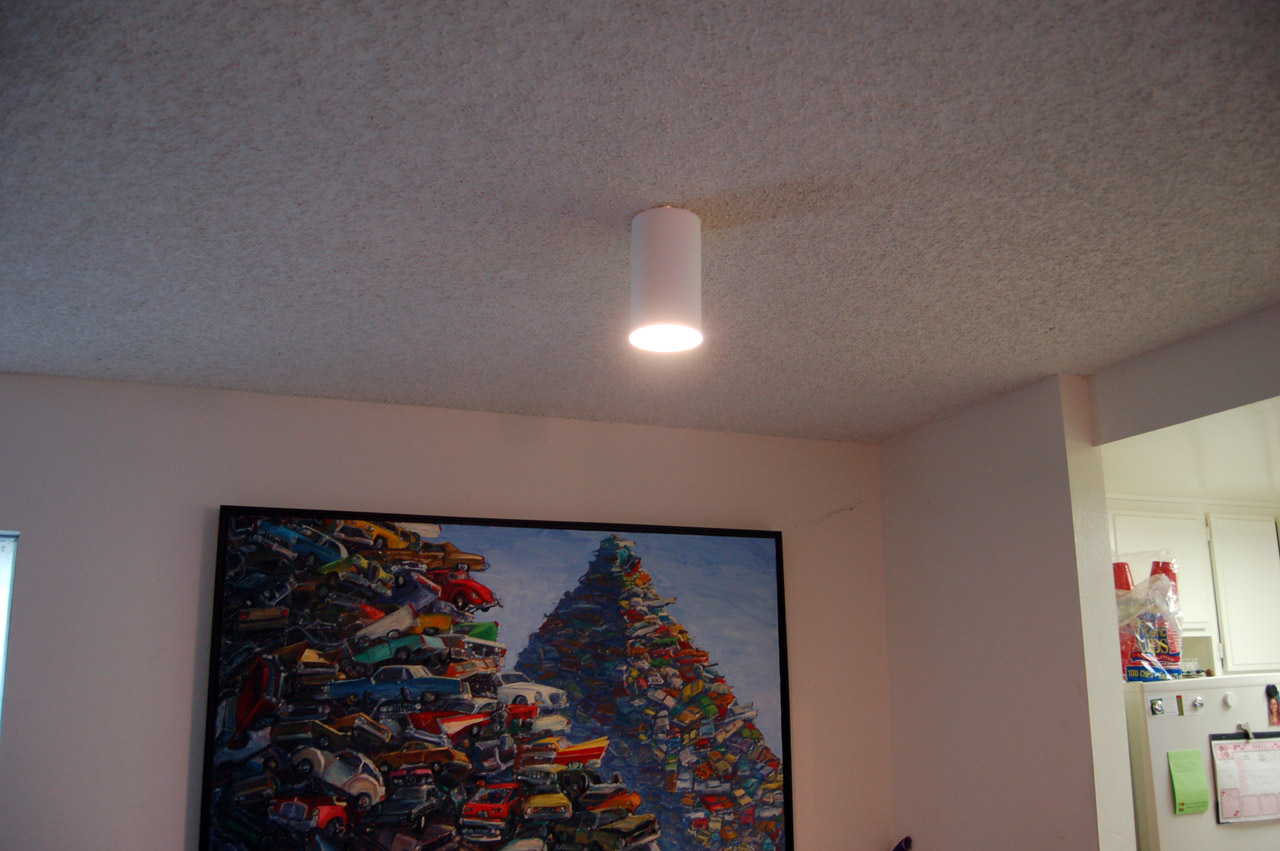
Kitchen Light
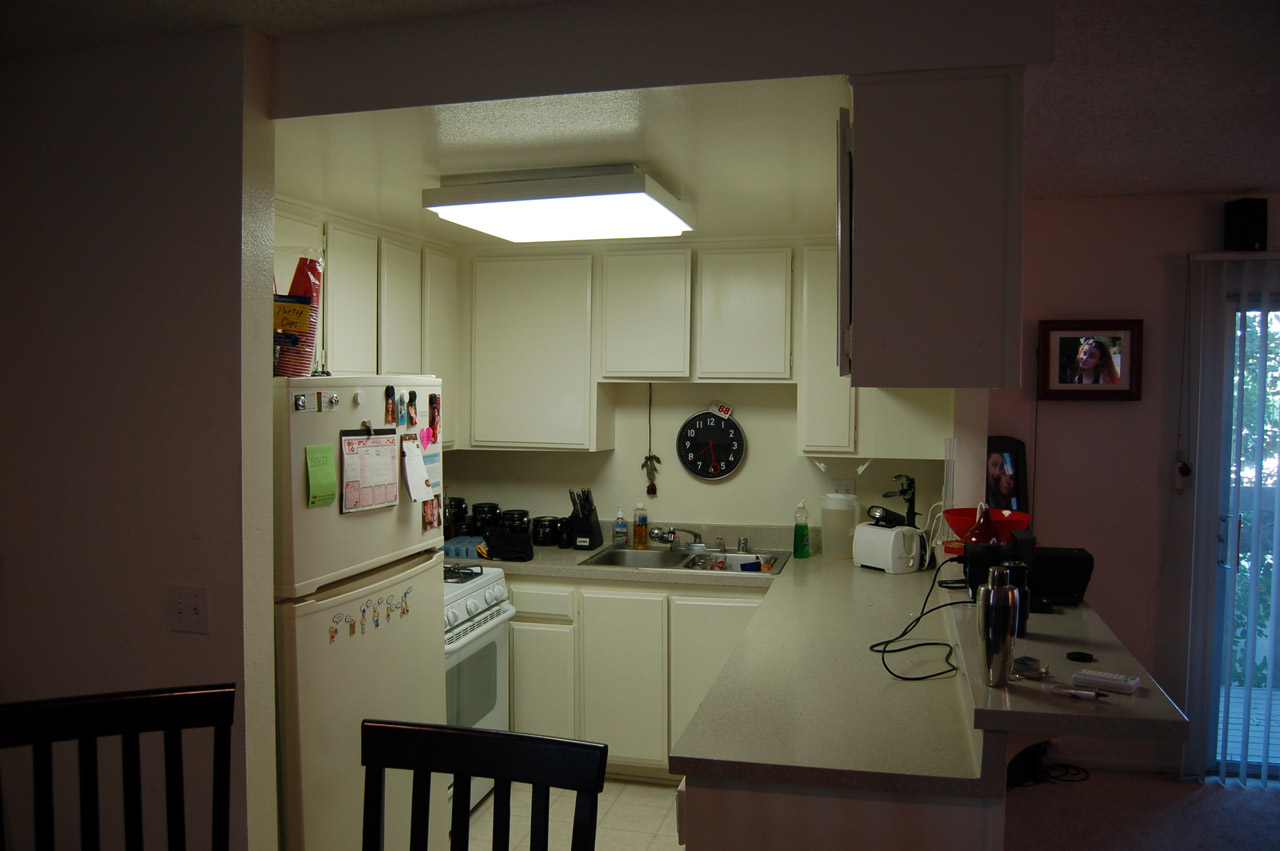
The kitchen light, being a florescent light, is not able to fade like a regular light, so we needed an appliance module. Only problem is that there is nowhere to interface it at. The light is hardwired into the ceiling. What I did was buy an inline florescent module (see the parts page for specific info) and opened up the fixture. I wired the module inline with the light and everything worked. The only inconvenience is that there is a light switch outside the kitchen that must always remain in the on position. Every once in a while somebody will turn it off and for the next day we will be wondering why our light won’t turn on when we want it to.
Laser
The laser reacts to music. I was able to put this laser on a regular X10 light module. The dimming effect does not affect the laser itself. Once the power dims below a certain amount, the laser simply shuts off. This is perfect for what I needed, and I didn’t even have to deal with the annoying clicking sound the X10 appliance modules make.
Strobe Light

The strobe light was placed in the kitchen since we didn’t want it to be shining directly in people’s faces or killing the blacklight effect in the main room. The one thing everyone wants to know is why the hell there is a strobe light in the toaster. When they ask, we simply smile and hand them the button.
Blinds Controller
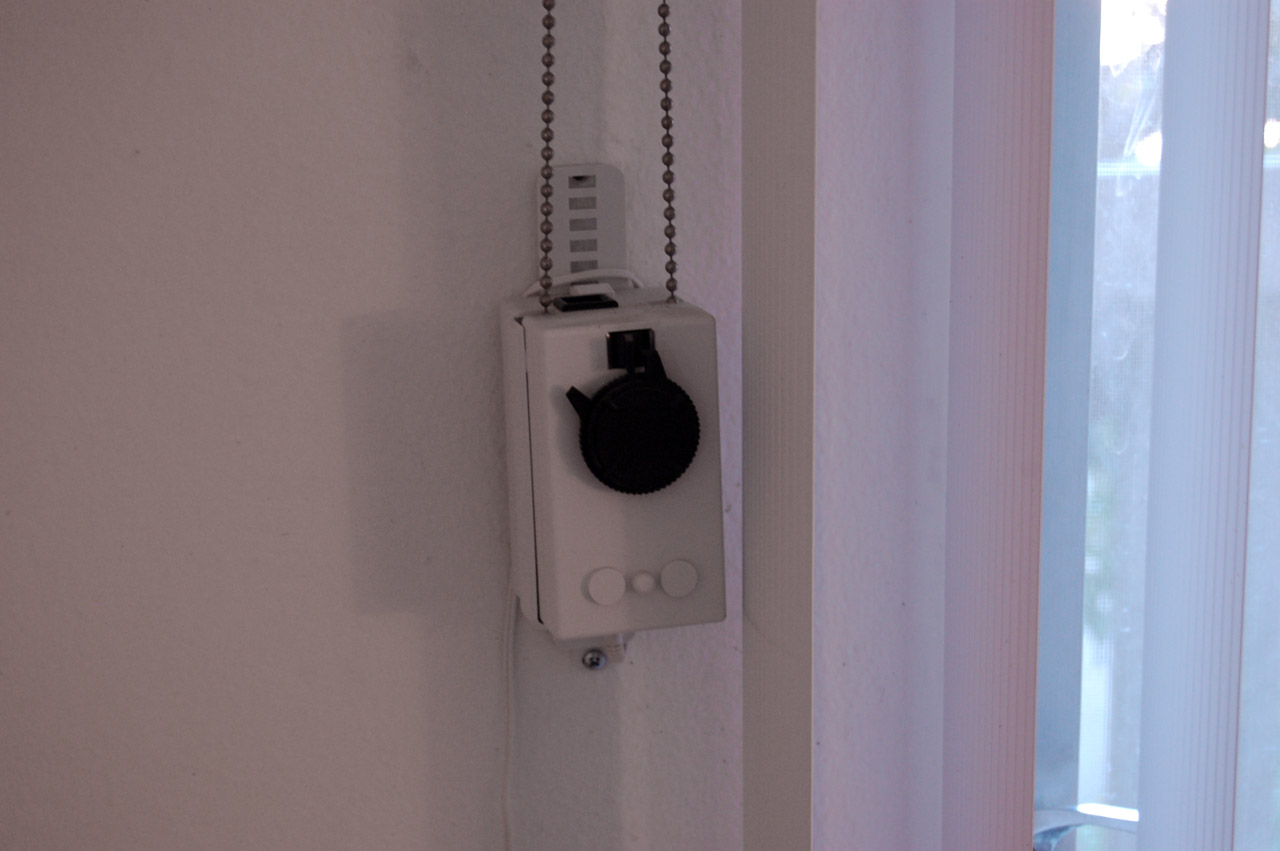
The most expensive part of the entire setup. This little device is extremely simple. All it contains are two relays and a motor. Easy enough to make, but I really didn’t want to spend time trying to fabricate a motor harness and assembly for the blinds. This is the one piece I would definitely say that I splurged on. I will say that it does give a nice clean movement of the blinds and has a lot of torque. At first I attached it to where it would pull the entire blinds open and closed, but then decided to just have it turn the individual blinds so they let light in or keep it out.
Fog Machine
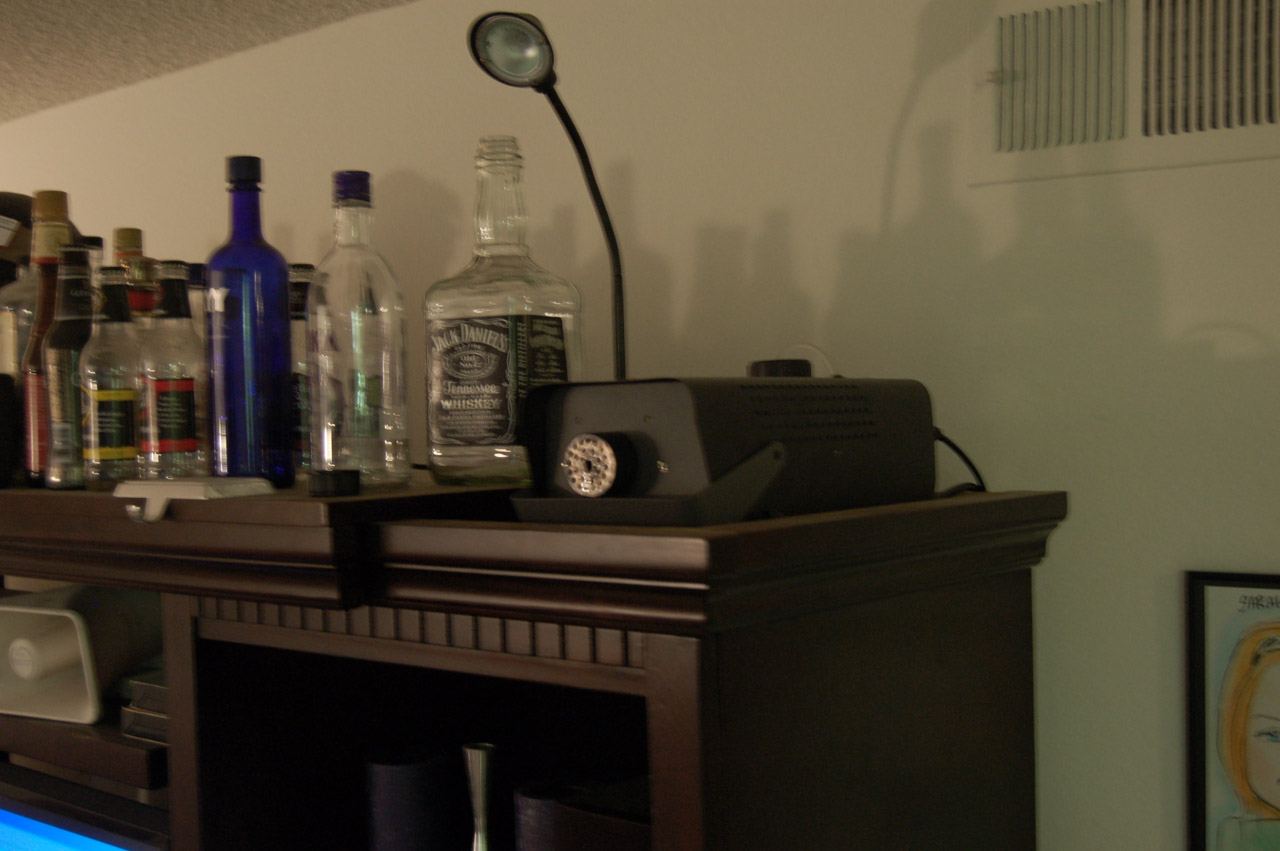
The fog machine has its own controller that tells is how often to turn on and how long to keep spraying fog. For this reason, all I needed to do was hook it up to an appliance module and turn it on. The machine takes a minute or so to warm the liquid enough to make fog, so I need to turn the fog machine on early in the party process. The earlier I turn in it, the quicker it will start spraying fog in the room (Which greatly enhances the laser btw).
LED Sign
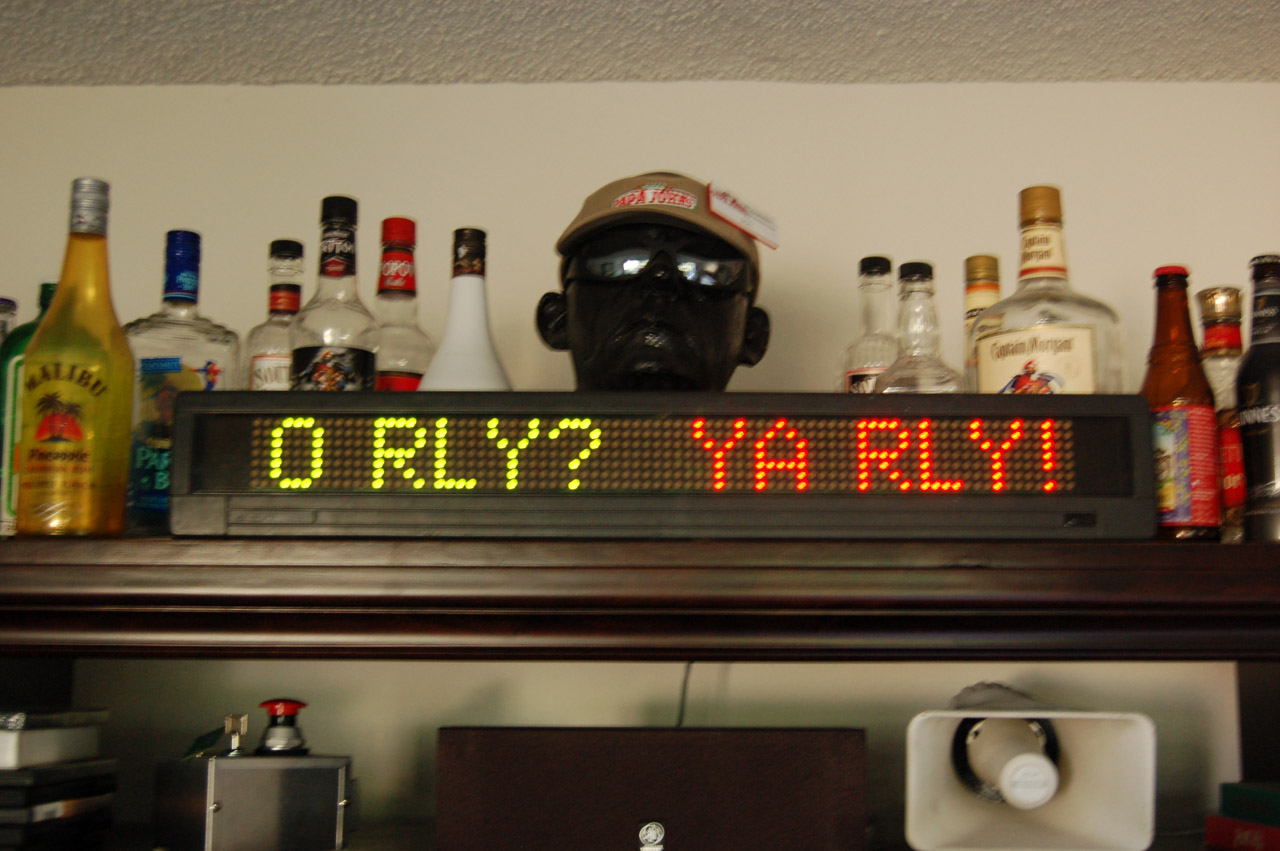
The LED sign is an older model BetaBrite sign which was purchased off of a friend a few years ago. It’s quite useful for many applications where I would want to display some data to the user through the means of an external display device. It communicates with the computer using pure RS-232 levels and the company that makes it has a well documented protocol book which makes it extremely easy to interface any program to. Right now I just have it set to execute a command line program that puts one line of text on it when the party starts, then puts up a blank line when it stops.
Why it was done
The idea of The Emergency Party Button came to me at work one day early in September of 2007. I can’t quite remember what got me thinking about it, but for some reason, I wanted to have a big red button available to me that did something spectacular when pressed. The idea of something so minimalistic and innocent causing something so phenomenal has always intrigued me.
I knew I wanted to make a button on a small box… I just had to figure out what I wanted it to do. Then it hit me… I don’t know why, but for some reason, an image popped into my head of Austin Powers and his pad. He has a button mounted on the wall that when pressed, an instant disco party starts. I knew I had to remake it. I drew a rough sketch of an over-dramatic button on a stand. Even the drawing had me excited.
I took the sketch, folded it up, and went to meet my girlfriend for lunch. When we sat at the table, I told her I had an idea for another project. She gave me the obligatory rolling of the eyes and asked what it was. I pulled out the sketch and showed it to her. When she saw it, she instantly smiled and laughed. I knew right away that this was the closest thing to her saying “do it” that I was going to get. Work had to begin right away.
I thought I had better look around the web before I just plow my way into this thing. I didn’t find much, but I did find a few things that helped me out. One such site that I would like to give a little credit to would be that of Zack Anderson, an MIT student who has transformed his dorm into an automated playground of sorts through his project, MIDAS. If you enjoyed my build, I would highly encourage you to visit his site. (http://web.mit.edu/zacka/www/midas.html).
The most important thing to me in this project was that of aesthetics. The button itself had to look good, no, amazing. The entire effect would be nothing more than lights turning on and off if the button wasn’t as good as it needed to be. I started looking for the button first. You would be surprised at how hard it is to find a button. I checked the local electronics warehouse to no avail. The closest thing they had were the buttons that you find on arcade game machines. Useless to me (well, at least for this project, hint hint).
After about a week of solid searching, I finally found a website that deals in industrial automation (think factories). I found the perfect button. It was a mushroom-style button with a nice looking bezel. Only problem… it was expensive as hell for just a button. But I had to do what I had to do and finally ordered it. After a week or so of doing nothing, the button finally came. After I got the button in the mail, the rest is history.
I have been tweaking, fixing, changing, adding, and switching things around with the setup for months and I don’t think I will stop anytime soon. We are moving out of our apartment and into a house next month, and one of the main things I keep thinking about is how I can get the entire party button system up and running in it.
Project Cost
The table below shows how much money I’ve spent on getting the party button working. Take this chart with a grain of salt. Some things can be cheaper, or some can be more expensive now.
| Item | Notes | Price |
| Strobe Light | Bought from Spencer’s | 20.00 |
| Laser Light | Called the “Fireball”, bought from Spencer’s | 20.00 |
| Black Lights | $20 each from Spencer’s | 40.00 |
| LED Sign | Bought from a friend. Normal retail is around $200 ish | 60.00 |
| Fog Machine | Spencer’s | 35.00 |
| Fog Liquid | 1 gallon | 15.00 |
| X10 Firecracker | Came with 1 transceiver, 1 remote, and 1 lamp module | 40.00 |
| X10 Lamp Modules | With 1 wall switch and 1 noise filter for computer | 42.00 |
| X10 Computer Interface | With 1 florescent light inline module | 47.00 |
| X10 Modules | 4 lamp modules, 3 appliance modules, 2 wall switches, 1 remote, 1 universal module, 1 transceiver, | 109.00 |
| Blinds Controller | Cheapest one I could find online at all | 89.00 |
| Button Project Box | Bought at Fry’s. Took forever to find the perfect size. | 13.00 |
| Red Mushroom Button | Again, hard to find the perfect look | 30.00 |
| BASIC Stamp II Homework Board | Fry’s. Way overkill, but it gets the job done. An arduino would be a way cheaper board to use. Or just a plain ol AVR and a MAX232 chip if ya got the time. | 80.00 |
| Aesthetically pleaseing LEDs | Had to take a trip to my local, horribly overpriced Electronics Warehouse | 8.00 |
| Key switch | Local Electronics Warehouse | 6.00 |
| $634.00 |
Austin Powers OR Glen Quagmire roflol 🙂
You say you would like to give a little credit to Zack Anderson. In how far is your project any different than what he already did? Red button, shutting blinds, turning off lights, LED, stroboscope, light show, fog machine, music… Seriously, what's new about your project?
Besides that it is still awesome, just not really that original.
Seriously…please release details, especially on the button. I'm sure I could figure out the X10 part, but a more detailed tutorial on the button would be great!
you should have stripper poles come out of the ceiling as well
I would give my eventual first born son for a button as such.
This is so incredibly awesome, I'm actually considering using my summer bonus to make a setup somewhat like this one, with the exception of hiding the button in the head of a statue or inside and book, for stealth emergency partys.
I enjoyed taking a break from watching porn to see that there is other cool stuff on the world wide web…
I'll give you a $million for your setup. What is your paypal account?
[B]@RichGuy[/B]: Ill give it to ya for $1000 😛
i really need the inventor for some good help on how to build this thing!
[B]@john[/B]: Hey john… what do ya need help with?
what about a schematic for the basic device?
[B]@Baron[/B]: well i didnt do a schematic for it just because its so simple. Its just a Basic Stamp board with one button, two LED's and a piezo speaker. Each one of those is on a different pin on the board.
wfonhwqejfewfnwfnc
You should have it fade the music out when you turn off the party.
best invention EVER!
GE NI US!!!
[B]@flip[/B]: that has to be the best and most informative comment left so far… thank you for your inspiration, flip
[B]@David[/B]: I thought about it, but it actually turned out better to make ti go off instantly. When it goes off all of a sudden, its gives the viewer the experience of an instant change (well, as instant as i could get)…
loosar!
Have you ever thought of trying to make it slightly more complex by adding more party configurations to say, a big blue button? That might increase the effect on those who have seen it before. Not to mention the variations would add some more flavor to the entire thing.
Saw it on news to me on CNN. Good luck. Looks like people have lots of good ideas. Here are mine. Lights on the box when activated, count down sound, shocker on the box for those not knowing how to activate it 🙂
Nice Job! I love it when people use their mind and their hands!
This is SOOOOOOOOO AMAZING!
Wow this has to be the the most pointless thing i have ever seen….. but also the most brilliant and now i want one hahaha
Muito boa essa parada!!! Pena que não vende o pacote!! Kkkkk
Ditch Haddaway soundtrack for 'woodpecker from outer space' for shock nostalgia. Coool gadget I've gotta admit!
Ok i set everything up at my house the same way you did but how do i make my computer listen for the x10 signal so it can run the macro script?
where did u get the blind controller?
[B]@Clint[/B]: I have a computer running linux (Ubuntu) in the other room. It is running a program called "heyu". Heyu uses an X10 module (The CM11A) that plugs into the serial port of your computer. You can set heyu to start a script when it detects a certain X10 message on your powerline.
[B]@Bum bOY[/B]: I got the blinds controller from SmartHome.com (http://www.smarthome.com/3142.html). It looks like theyve raised the price $10 since i bought mine 🙁
What education do you have to make things like that?
Ever had guests?
Wow, now all you need is some friends and you'll be TOTALLY SET!
[B]@funnypanda[/B]: I dont have any formal education in the sense (aka no engineering degree or crap like that)… im just a maker. Its in my blood. I like to tinker with stuff and tear things apart to see whats in them. People like me are rising on the web more and more. Check out Make magazine for cool projects like this one. (http://makezine.com/)
[B]@Blondeboy and Kaleb[/B]: Yes I have friends. Everyone who sees this insists that I dont, but whatever. We always have parties at our place. Anytime people come over theres always a fight about who gets to press it. The emergency party button was made for them to have fun with… and its just a plus that I put it online.
I would like to make my own EPB, and I already have plenty of disco lights and etc. I don't know much about programming or using the x10 software on a computer, so some more information on the Basic Stamp and x10 firecracker.
OMG, that was hillarious, I love it! I am sure we could be solving global warming or something, but somehow this just cracks me up!
That is friggin' awesome! I think everyone should need that 🙂
I'm in my fifties (the new forties) and I love the idea! Your girlfriend must marry you after this…parties whenever she likes!
so lemme try this. the cm11a recives the x10 START signal runs the macro which tells the firecracker to send ON. when you push the button again the cm11a recives the stop signal and tells the firecracker to send OFF is that right?
jojo… i need one of this!! right now!!
THAT is FREAKIN' AWESOME! Kudos for the idea, and even moreso for following through with it!
JAJJAJA… U RULES
[B]@Clint:[/B] Not quite… but close. The firecracker is actually attached to the button itself. When I press the button, the firecracker sends a start signal to the X10 wall transceiver, which then sends the signal to the CM11A and starts the party. When I press the button again, it sends a stop signal the same way.
fade off the music with winamp crossfader plugin….. simulate the stop button and thats taken care of…. You get the "nod"!!
So how did you program your firecracker in conjunction with the giant red button? Doesn't that delve into manually configuring baud rate, parity, not to mention how to control which x10 signal is being sent? And how did you program it to use the one button for on / off whereas most x10 controllers use one button for each on and off? If you can add info to your button-making section I'll totally donate some $$ to the project. I have a setup almost twice as expensive as yours now, but without the button it still just doesnt cut it.
[B]@Mike[/B]: Yes, the microcontroller basically sends a serial string to the firecracker module. I used some code I found online for that. When I get a chance, I'll post the source for the Basic Stamp on here. I'll email you and the couple others who wanted me to put it up. (If you didnt use your real email address when making that comment, make another comment with a real email so I can send ya something saying I put it up.)
You sir are made of AWESOME and WIN!!!!!
I'm just getting into home automation myself, and this has got to be the coolest idea I've seen so far. My wife is gonna kill me when she finds out what I did with all the Automation stuff I've been buying lol.
I'd like a look at that source! This is such a cool project.
I want to build one of these can I have some help.