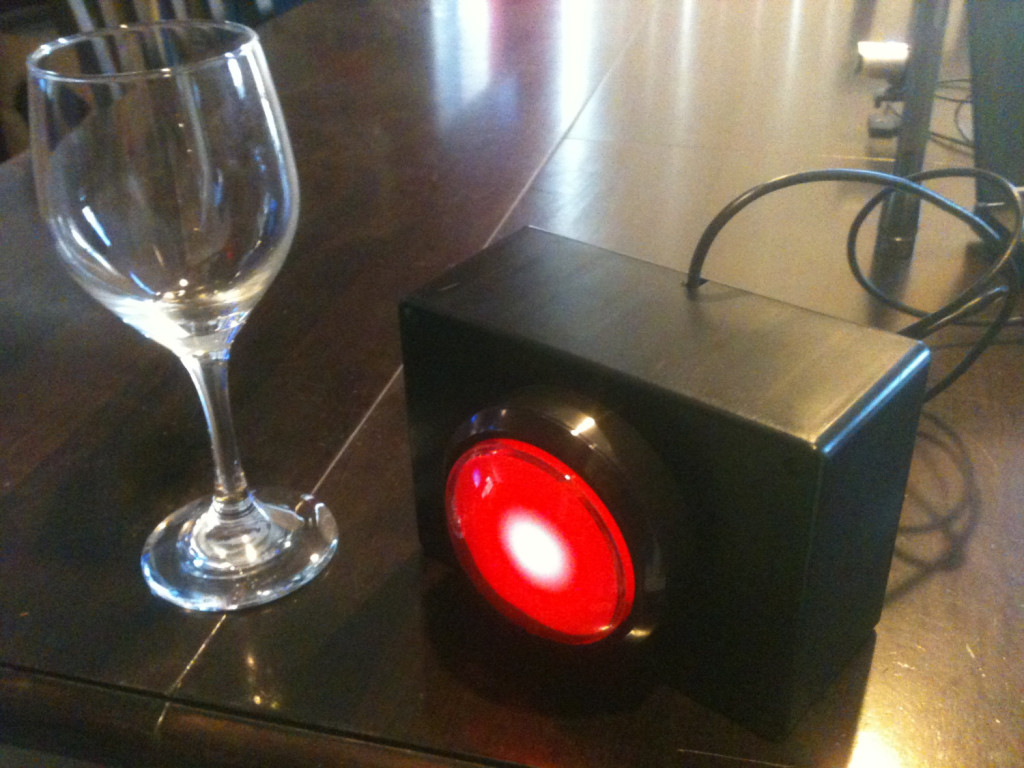
The Emergency Party Button began as a novelty idea that has become the focus of every event that goes on in our home. A big red button is, by human nature, an object of compulsion. If you see it, you are overcome with the desire to push it. But what happens when you do?
Details
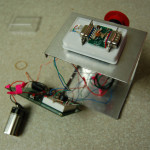
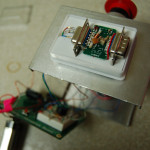
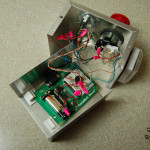
The Emergency Party Button consists of 3major components: The actual button itself, the controlling computer, and all the controlled devices. The button itself is the only real piece of equipment that any user is interacting with, which is why it has to be the best piece of the entire set up. Aesthetics is key. I did not want to buy a premade button box. I had a perfect idea of what I wanted, so there was only one thing to do; build it myself.
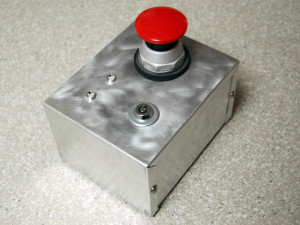
 The main visual aspect is of course the giant red mushroom button. I had to buy this online since I couldn’t find the right looking button in any electronics store around. It cost a lot more than I had first planned, but it was well worth it. I bought the button from AutomationDirect.com. Check out the parts list page for a cost breakdown.
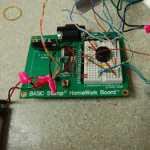
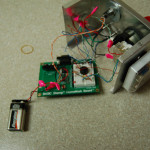
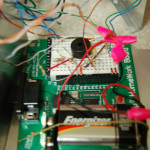
At the heart of the button is a Basic Stamp II (well, technically, a Basic Stamp Homework Board, since it wasn’t going to any good use anyways). The basic stamp is used for a few small things. Once power is applied by turning on the key on the top of the button box, the basic stamp waits until the button is pressed. Once it is, it first plays a short tune on a piezo speaker to signify that the button has been pressed, it turns on a red LED showing that party mode is currently on, and then it uses the Firecracker X10 module on its serial line to send an X10 signal to the transceiver plugged in across the room. Click the images to enlarge. Also, please forgive the crappy pink duct tape holding the wires together, as I didn’t have access to a soldering iron when I wired it up.
********* Once the X10 transceiver receives the wireless signal from the party button, it then forwards it out towards a computer that is always listening for the signal. Once it detects the signal that the button was pressed, it then runs a script which starts the party initiation process. The process is as follows:
- Turn off hallway light
- Close the blinds
- Turn on the fog machine (Takes a while to warm up)
- Turn off the kitchen light
- Turn off the poker light
- Turn off the living room lights
- Start the mp3 (Haddaway – What is love)
- Turn on the blacklights
- Turn on the laser when the main beat of the song starts
- Turn on the strobe light when the chorus starts
Once the party has started, at any time the party button may be pressed again. This will turn off the red LED, play a simple tune to signify that the party is stopping, and it will send another signal. Once the computer detects this signal, it will basically run the same script to turn on the party except it will turn the party equipment off and the lights back on while stopping the music. When you turn the party on, things are timed and ordered for maximum effect (such as the strobe turning on when the chorus comes in), but when the party is being stopped, the music stops and the lights come on almost immediately.
UPDATE! Did you know I now make and sell a custom USB button that you can use to create your OWN emergency party? It’s called the Smarty Button! It can literally control anything you want it to 🙂
Devices
Blacklights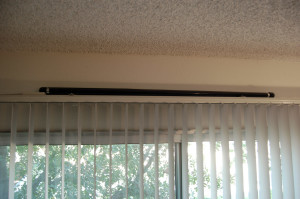
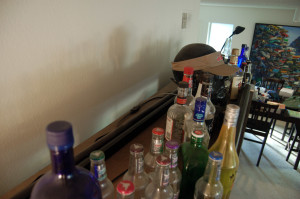
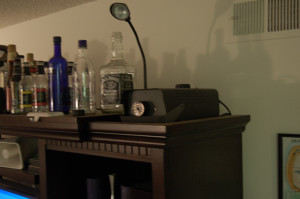
There are 2 blacklights: On on top of the entertainment center and one on top of the curtains. One simply wasn’t enough to light the entire room. Both blacklights are running on the same X10 switch with extension cords. One problem I had with the blacklights was the fact that florescent lights have always given problems with X10 appliance modules. The appliance modules have a ‘feature’ that turns the device on if it detects that it has been unplugged and replugged in. Apparently the high voltage ballast in florescent lights interferes with this though. When i tried to shut the blacklights off, they would stay off for about 2 seconds, then turn right back on. To remedy this, I found a tutorial online that showed how to disable the ‘feature’ in the X10 module. Basically it involved cutting a few leads on the circuit board. Once they were cut, the blacklights worked perfectly
Living Room Lights
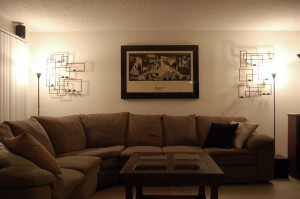
The two standing lights in the living room weren’t necessarily a challenge, but they were a pain. That entire wall of the apartment was apparently on a different circuit or something, because no X10 signals could ever get to those outlets. So basically what I had to do was run extension cords all around the place to get to an outlet that the signals could get to. Like the blacklights, both lights are plugged into one X10 module. This just makes things easier and better looking. (It looks way better when both lights dim down at the exact same time)
Poker Light
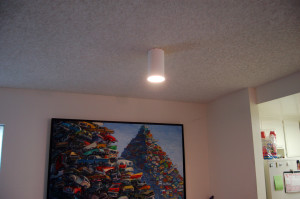
Why do I call this a poker light? Simple, it’s over the poker table. My other half likes to call it our dining table, but I don’t think I have ever eaten anything on that table since we bought it. Anyways. The poker light is simple a light bulb inside a shroud on the ceiling. If I were to install an X10 Socket Rocket, the kind of module that screws in between the bulb and the socket, then the bulb would be sticking out of the shroud, looking horrible. That is why I decided to instead install a switch panel module instead. The unit sits behind the faceplate of the light switch. This also lets us turn the light on and off by using the actual switch instead of solely X10 control.
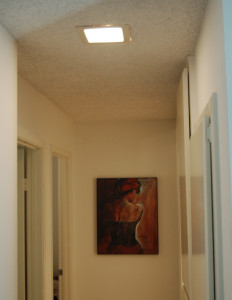
Hallway Light
The hallway light is exactly like the poker light in the fact that we installed a panel mounted module. Other than that, it’s just another boring light in the ceiling.
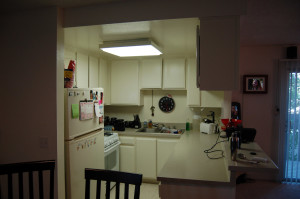
Kitchen Light
The kitchen light, being a florescent light, is not able to fade like a regular light, so we needed an appliance module. Only problem is that there is nowhere to interface it at. The light is hardwired into the ceiling. What I did was buy an inline florescent module (see the parts page for specific info) and opened up the fixture. I wired the module inline with the light and everything worked. The only inconvenience is that there is a light switch outside the kitchen that must always remain in the on position. Every once in a while somebody will turn it off and for the next day we will be wondering why our light won’t turn on when we want it to.
Laser
The laser reacts to music. I was able to put this laser on a regular X10 light module. The dimming effect does not affect the laser itself. Once the power dims below a certain amount, the laser simply shuts off. This is perfect for what I needed, and I didn’t even have to deal with the annoying clicking sound the X10 appliance modules make.
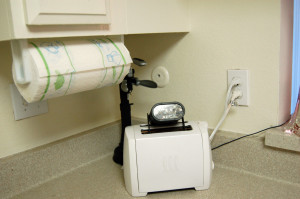
Strobe Light
The strobe light was placed in the kitchen since we didn’t want it to be shining directly in people’s faces or killing the blacklight effect in the main room. The one thing everyone wants to know is why the hell there is a strobe light in the toaster. When they ask, we simply smile and hand them the button.
Blinds Controller
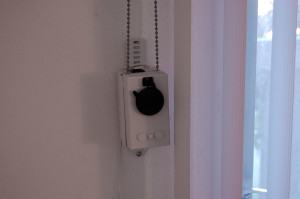
The most expensive part of the entire setup. This little device is extremely simple. All it contains are two relays and a motor. Easy enough to make, but I really didn’t want to spend time trying to fabricate a motor harness and assembly for the blinds. This is the one piece I would definitely say that I splurged on. I will say that it does give a nice clean movement of the blinds and has a lot of torque. At first I attached it to where it would pull the entire blinds open and closed, but then decided to just have it turn the individual blinds so they let light in or keep it out.
Fog Machine
The fog machine has its own controller that tells is how often to turn on and how long to keep spraying fog. For this reason, all I needed to do was hook it up to an appliance module and turn it on. The machine takes a minute or so to warm the liquid enough to make fog, so I need to turn the fog machine on early in the party process. The earlier I turn in it, the quicker it will start spraying fog in the room (Which greatly enhances the laser btw).
LED Sign
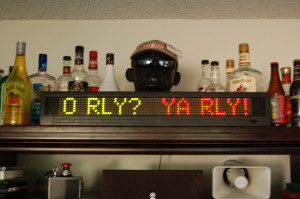
The LED sign is an older model BetaBrite sign which was purchased off of a friend a few years ago. It’s quite useful for many applications where I would want to display some data to the user through the means of an external display device. It communicates with the computer using pure RS-232 levels and the company that makes it has a well documented protocol book which makes it extremely easy to interface any program to. Right now I just have it set to execute a command line program that puts one line of text on it when the party starts, then puts up a blank line when it stops.
Why it was done
The idea of The Emergency Party Button came to me at work one day early in September of 2007. I can’t quite remember what got me thinking about it, but for some reason, I wanted to have a big red button available to me that did something spectacular when pressed. The idea of something so minimalistic and innocent causing something so phenomenal has always intrigued me.
I knew I wanted to make a button on a small box… I just had to figure out what I wanted it to do. Then it hit me… I don’t know why, but for some reason, an image popped into my head of Austin Powers and his pad. He has a button mounted on the wall that when pressed, an instant disco party starts. I knew I had to remake it. I drew a rough sketch of an over-dramatic button on a stand. Even the drawing had me excited.
I took the sketch, folded it up, and went to meet my girlfriend for lunch. When we sat at the table, I told her I had an idea for another project. She gave me the obligatory rolling of the eyes and asked what it was. I pulled out the sketch and showed it to her. When she saw it, she instantly smiled and laughed. I knew right away that this was the closest thing to her saying “do it” that I was going to get. Work had to begin right away.
I thought I had better look around the web before I just plow my way into this thing. I didn’t find much, but I did find a few things that helped me out. One such site that I would like to give a little credit to would be that of Zack Anderson, an MIT student who has transformed his dorm into an automated playground of sorts through his project, MIDAS. If you enjoyed my build, I would highly encourage you to visit his site. (http://web.mit.edu/zacka/www/midas.html).
The most important thing to me in this project was that of aesthetics. The button itself had to look good, no, amazing. The entire effect would be nothing more than lights turning on and off if the button wasn’t as good as it needed to be. I started looking for the button first. You would be surprised at how hard it is to find a button. I checked the local electronics warehouse to no avail. The closest thing they had were the buttons that you find on arcade game machines. Useless to me (well, at least for this project, hint hint).
After about a week of solid searching, I finally found a website that deals in industrial automation (think factories). I found the perfect button. It was a mushroom-style button with a nice looking bezel. Only problem… it was expensive as hell for just a button. But I had to do what I had to do and finally ordered it. After a week or so of doing nothing, the button finally came. After I got the button in the mail, the rest is history.
I have been tweaking, fixing, changing, adding, and switching things around with the setup for months and I don’t think I will stop anytime soon. We are moving out of our apartment and into a house next month, and one of the main things I keep thinking about is how I can get the entire party button system up and running in it.
Project Cost
The table below shows how much money I’ve spent on getting the party button working. Take this chart with a grain of salt. Some things can be cheaper, or some can be more expensive now.
| Item | Notes | Price |
| Strobe Light | Bought from Spencer’s | 20.00 |
| Laser Light | Called the “Fireball”, bought from Spencer’s | 20.00 |
| Black Lights | $20 each from Spencer’s | 40.00 |
| LED Sign | Bought from a friend. Normal retail is around $200 ish | 60.00 |
| Fog Machine | Spencer’s | 35.00 |
| Fog Liquid | 1 gallon | 15.00 |
| X10 Firecracker | Came with 1 transceiver, 1 remote, and 1 lamp module | 40.00 |
| X10 Lamp Modules | With 1 wall switch and 1 noise filter for computer | 42.00 |
| X10 Computer Interface | With 1 florescent light inline module | 47.00 |
| X10 Modules | 4 lamp modules, 3 appliance modules, 2 wall switches, 1 remote, 1 universal module, 1 transceiver, | 109.00 |
| Blinds Controller | Cheapest one I could find online at all | 89.00 |
| Button Project Box | Bought at Fry’s. Took forever to find the perfect size. | 13.00 |
| Red Mushroom Button | Again, hard to find the perfect look | 30.00 |
| BASIC Stamp II Homework Board | Fry’s. Way overkill, but it gets the job done. An arduino would be a way cheaper board to use. Or just a plain ol AVR and a MAX232 chip if ya got the time. | 80.00 |
| Aesthetically pleaseing LEDs | Had to take a trip to my local, horribly overpriced Electronics Warehouse | 8.00 |
| Key switch | Local Electronics Warehouse | 6.00 |
| $634.00 |
[B]@john[/B]: What do ya need help with?
You should maket this thing! That would be awesome! Cause at this point I lack the skill and the funds to make this thing…oh well…yeah! You should totally consider marketing this.
I GOT IT! Plasma you are the man. I set mine up a little different but it works the exact same way. My party button is a rocket switch red cap up is on flip it down is off. It sends the CM11A the on. Once it is recived the macro runs.
I just used the firecracker remote's board. when you click on it connects the on switch when you flip off it shorts it off.
Plasma you are a freaking party GOD
i made mine, mine was a little different and had more stuff in it. mine closes 15 blinds all through out my house dims all the light starts three fog machines and loads what is love has three strobe lights and starts a lazer light show and then pulls out my slide out beer table, and then when u hit the button again every thing goes off in three seconds
hi im making a video and i'll send it to whoever wants it.
i'll give u 100$ if u give me the box with the button and chip all together
[B]@David[/B]: Hey David, if you make that video, post a link to it in here. I'd definitely want to see that.
[B]@Crazy[/B]: It cost me more than that for the parts alone. Its got the $80 Basic Stamp board, the $30 mushroom button, the $13 enclosure, the $8 LED's, the $6 key switch, and the $15 firecracker module. Thats a $150 box that I spent the time drilling, buffing, wiring, soldering, and tweaking. Not to mention the fact about all the coding that I had to work out and get just right to be able to actually interface with that damn firecracker module. The hours of code changes and revisions put the PERSONAL value of this box up near the $300 to $400 level before I would even think about selling it.
You need a captcha on your comments page. 🙂
How's the Wife Acceptance Factor on this rig?
[B]@Rocky[/B] yea yea, im working on it :P…. haha… and the WAF is surprisingly pretty high. Since the elements were mostly hidden from view, it didnt invade any territory (Well, except for the toaster, heh)… and the fact that it can easily be turned on and off with the single button makes it all the better. 🙂
Hey. I love the idea and am planning to make my own implementation of this. I am hoping I can find all of the parts I need here in the UK. Is there any chance you can share the source for the Basic Stamp as I will admit that I have no idea where to begin with this. Thanks a lot.
LOL
wiil my project off this year!!!
Has anyone tried to do this with an Arduino Diecimila? If so have you had any luck and also whiich pins do you connect to on the Firecracker?? If anyone has any circuit schematics they could enlighten me with it would be appreciated!!
cool idea but you are probably the weakest cameraman on the planet. all the panning made me sea sick.
I like the idea, but honestly! Flourescent lights in the kitchen? What is this, east Berlin 1986? For someone who wigs out his apt. like this I'd really take care of the basics first 🙂
this is a test message.
Plasma, one last question for my project I was hoping you could answer. Regarding the button, I took Clint's advice and just used the circuit from one of the X10 remotes but now I must know what kind of contact block for the switch to purchase. I noticed you had one in your photos under the big red button, and was wondering if that's how you control the on / off with one mechanism, and if so what model contact block I would need for the actuator. I'm thinking momentary 2-position Push-Pull that would close the circuit for the X10-On signal when pressed and close the circuit for the X10-Off when depressed, but would appreciate your advice before risking the $150 on a switch that may not work.
[B]@Mike[/B]: If you use the remote then you arnt going to be able to send a different on/off command. Theres usually 2 buttons, one for off, one for on – in other words, a push-pull button wouldnt work. The closest thing you can do without using a micro controller (like a Basic Stamp II) would be to wire a momentary button to one of the 'on' buttons on a remote. Your new button remote will always send the same signal, so its up to your computer and whatever script you make to be able to tell if the 'party' is already running or not. If the party is running, your script will turn it all off, and if its not running, it will start it. Hope that wasnt too confusing 😛
My name's Colby – "Like the Cheese" and I making my own website would it be ok if I had a link on my website to your site? I think that your idea and the fact that you followed through on it all the way is awesome. You can reach me at my email address. My website is colby.webnode.com
Sincerely
Colby
[B]@Colby[/B]: Hey Colby, yeah, of course you can link to my site from yours. As a general rule of the internet, ya dont really have to ask if you want to make a page that links to somebody else's website 🙂 The only time you should make sure your allowed to is if your putting a link of your site onto somebody else's. Sometimes that can be considered rude. Thanks for showing an interest in my project!
Hey could you please send my the code that sends the serial string to the firecracker?
THANKS
AWESOME
Now all you need is to replace your imaginary friends with real ones.
Rude; I think it's pretty kick ass.
The only improvement I can think of would be the addition of a cardboard cutout of Patrick Swayze that slides out from behind your media center. "Hey guys, Patrick Swayze showed up to party!"
Wow…That's crazy…but also very cool. Way too technically advanced for me though!
Hey Plasma, could you possibly email me some of the technical documentation you used (i.e. schematics for the push button module as well as some of the X10 code)? I'd love to try to set one of these up on my own, but I'm not much of a programmer.
Thanks!
david, pleasesend me the video @ computermdr@aol.com
Hey Plasma, can you email me some of the technical documentation you used like schematicsics for the push button module as well as the X10 code? I would love to set this up and that would help alot, thanks!!
Most interesting…..
I'd seriously pay like $50 for the schematics on the box (or atleast some more detailed instructions) and the source code. seriously though I would. Email: vrixen@gmail.com
Can you tell me if there is a premade Button Box that will do the same effect or if there are instructions on what you did for the Button Box.
f*ck yeah. This is really awesome. But I was surfing for a porn button … bye!
The big red button is an "E-Stop" button. Check commercial stores where electricians buy their parts, circuit breakers etc. (Look for the beat up pick up trucks and pickups. A big box store won't have them) Ask for an OEM discount and tell the guy behind the counter what you're doing and you might get it.
Yes, you can look for an E-Stop button, but when you do, make sure its not the kind that is push off-pull on. In other words, you want a momentary push button. Regular e-stop buttons will stay in the position you put them.
Thanks Plasma! I bet you get a ton of people offering you $ for your device, which is kind of silly of the person asking, becuase the device wouldn't be good without the entire setup.
I'm surprised you put all that time and money into building the button box when the X-10 KR15A "Big Red Emergency Button" http://kbase.x10.com/wiki/KR15A (around $5 to $10 on eBay) in conjunction with software like Heyu can accomplish the same thing, lacking only the LED on the button box.
[B]@Charles Sullivan[/b]: Of all the comments left on here criticizing my project, yours is the first one that I'm pretty much going to call you an idiot for. I built my box for the specific purpose of LOOKING GOOD. The mushroom style button is a hundred times better than any plastic thumb-sized button will ever be. And the activation sound when you press it adds to the effect, as well as the status lights. Don't criticize somebody for taking the time to make something better than crappier alternatives. Ever.
Hell, using your logic, I could have just used the regular X10 palmpad remote (pictured below) to turn on the devices. Your missing the entire point. Shock and awe value. Impressiveness. Admiration of dedication. If you're going to do it, [B]do it right.[/B]
[img]http://graphics.x10.com/images_affiliates/graphics_ms/products/palm_remote_large.gif[/img]
Oops, sorry for stepping on your ego. If the "shock and awe" value to you of the LED on the button box is worth the additional $90 for basic stamp and firecracker over using the circuit board of a $5 X10 remote, who am I to argue.
Do you know the model of your BetaBrite LED sign? I wanted to do something similar like interfacing it to a custom program but I don't know if you can send data in real time.
Love love love it, no idea if i am going to be able to do it, but i am sure going to try!
Sir, I applaud you. Your technical knowledge, creativity, and overall badassery combined to make an awesome innovation or at least a sweet application of existing technology. I come up with ideas like this and people look at me like I'm stupid. Keep on creating, listen to the constructive criticism, and brushing off the naysayers.
[b]@Nick[/b]: Its just the standard 1024e i believe. And yes, you can send data in real time. It actually accepts variables too. You can put a message on it that references a variable, such as "The current temperature is: $variable". Then you can just update the variable from your computer.
Are you gonna start selling these anytime soon? You could probably get like eigh hundred bucks easy if you offered installation along with the button itself.
Nice work – plus there's not really any limit as to how crazy this could go (assuming unlimited financial resources, and an understandling landlord). Fpr instance, you can get these intellitent disco lights that are normally retracted into the ceiling until activated, then the pop out and start doing stuff, or a light-up kitchen dancefloor!
Very cool, very well done. Don't listen to the idiot with the Palmpad Remote. Some people build it, some just post comments.
Great job!
Wow, this is incredibly awesome. My friend and I are going to build something like this in his room, because we've been inspired by your project. Truly excellent work.
p.s. Charles Sullivan is a tool.
That was great. If you ever mod your set up a light show would be great and can easily be controlled by the music.
Also the led sign needs to be cued right after the song start, hah. Oh and an emergency stop party button in the closet because you never know when a party might need to be stopped.
I would love to try to build this for myself at home. If you could send me the could you used that would be awesome.
Man that was so so so cool, I wish I could set that up in my house, although I have no technical knowledge…where could i learn?